2.1 Basics
Virtualmin offers even schedueled backups. For that, you have to be the system admin via Virtualmin and NOT the server admin. Scheduled backups are helpful to save you some time in comparison to manual backups. It is even recommended to do frequent backups, to save your data in the event of a server outage. It is good practise to set your schedule more frequently, the more you do on your server.
2.2 Creating scheduled backups
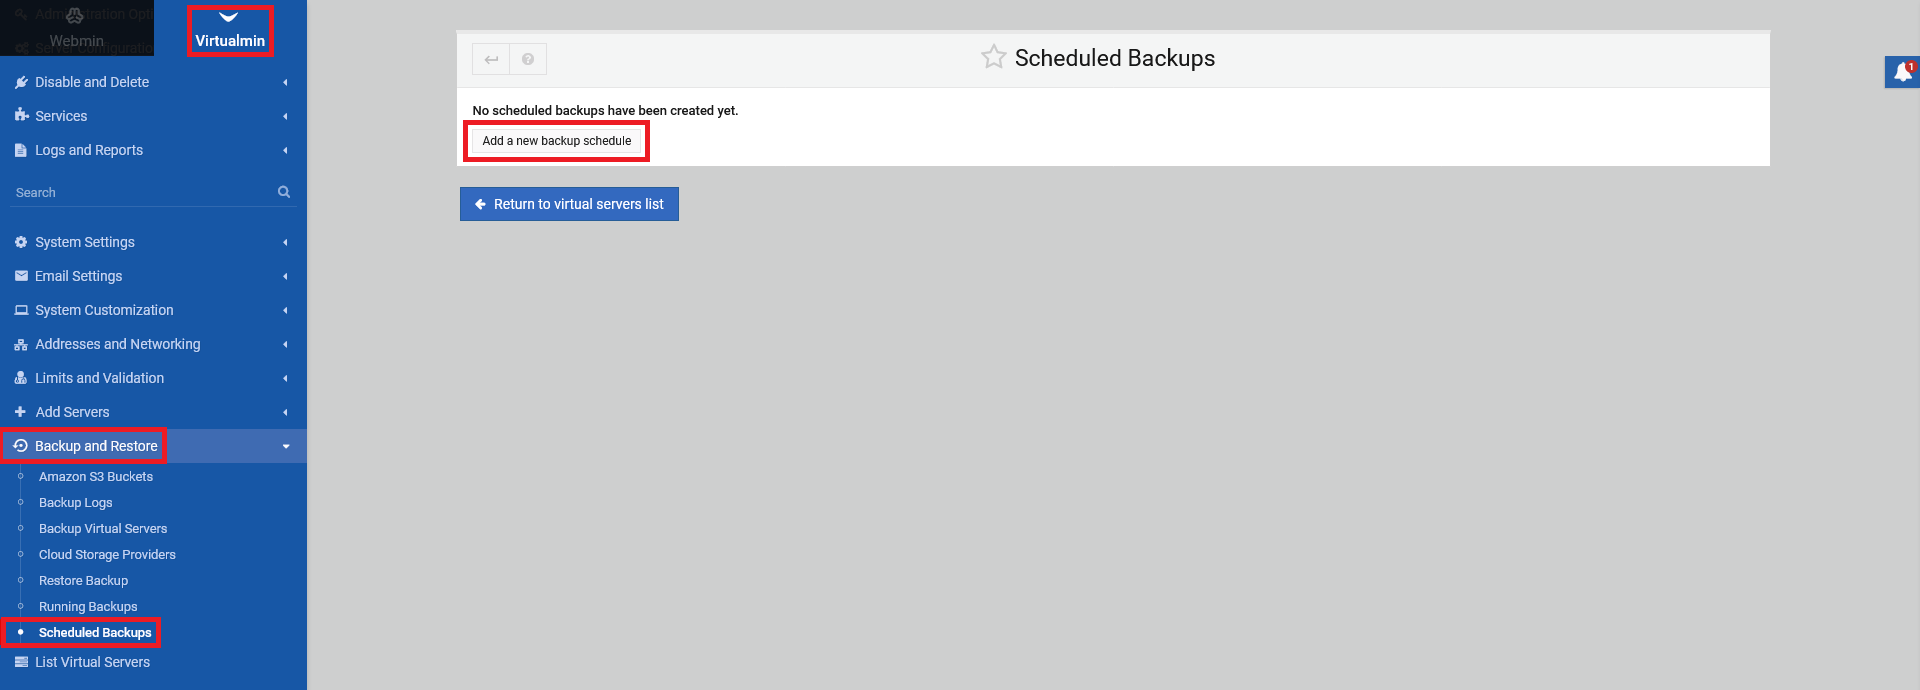
To setup scheduled backup, go to the left Virtualmin menu and select under die section "Backup and Restore" the option "Scheduled Backups" from the expanded sub-menu. Click on "Add a new backup schedule" to begin setting up a new schedule.
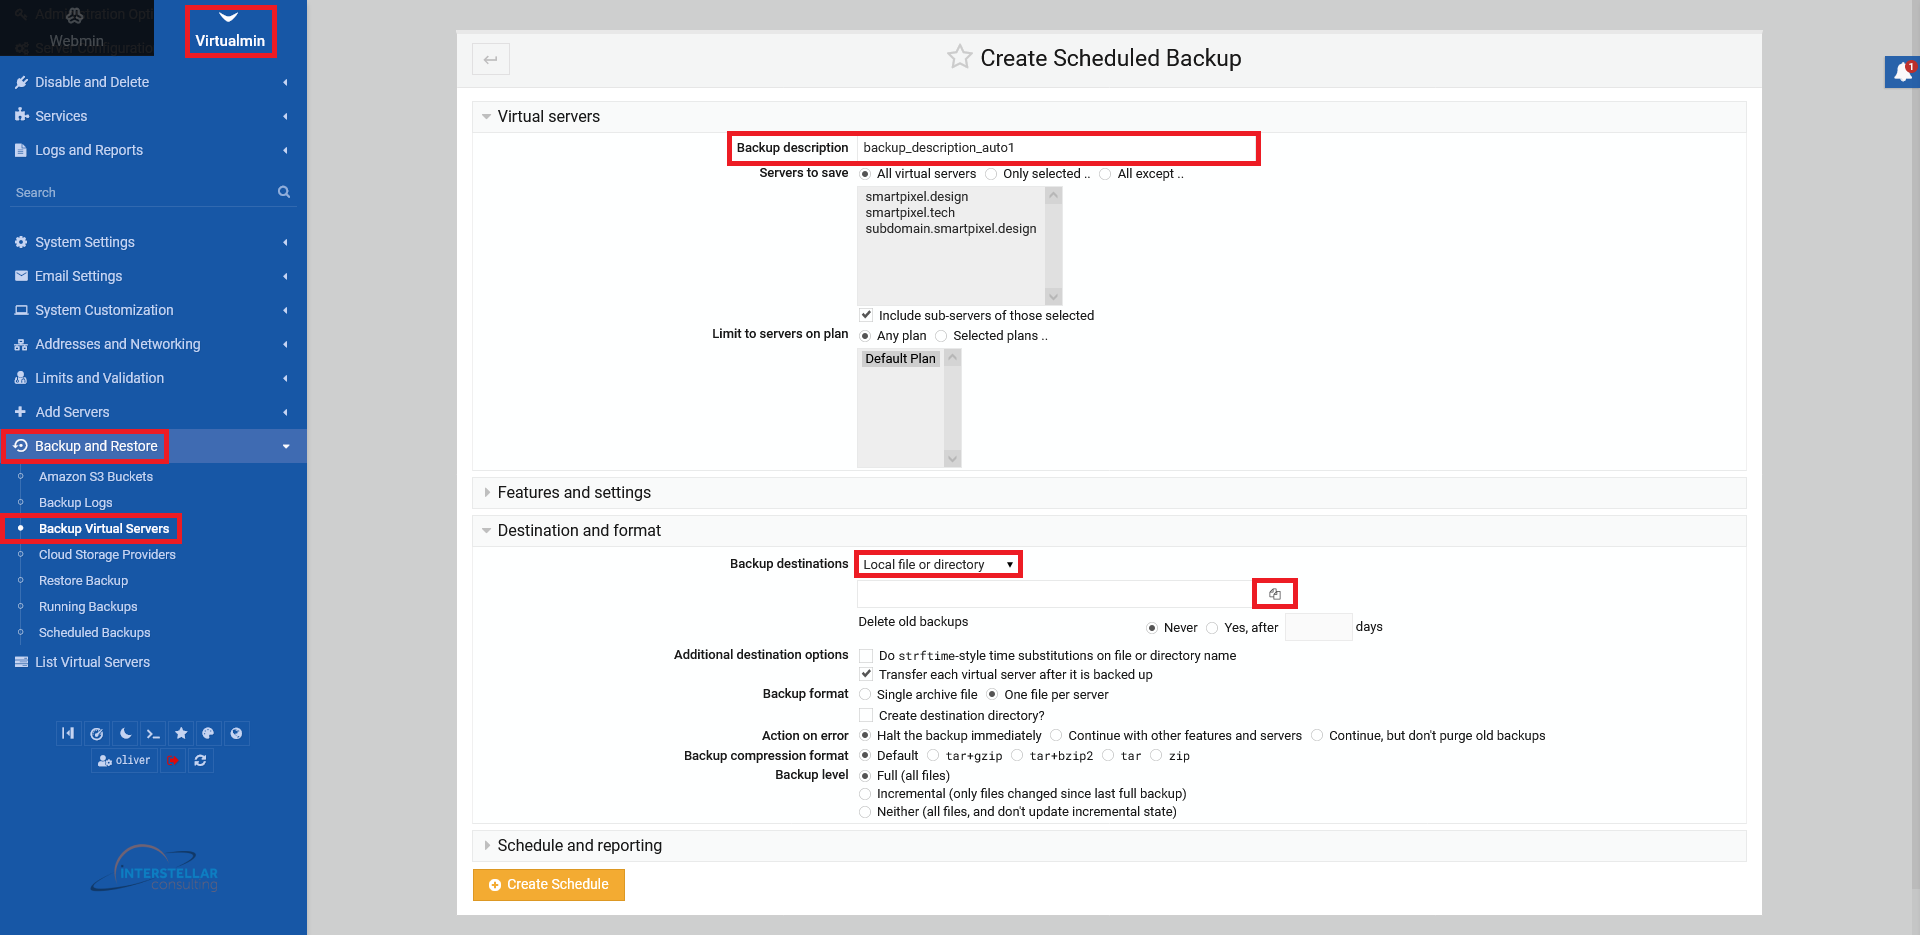
Now, you can specify a "Backup description", select the servers you want to backup (usually a backup of all servers is fine) and choose a scheduling plan. All default values are fine. If you want additional settings, go to the section "Features and settings" (usually you can leave it as default).
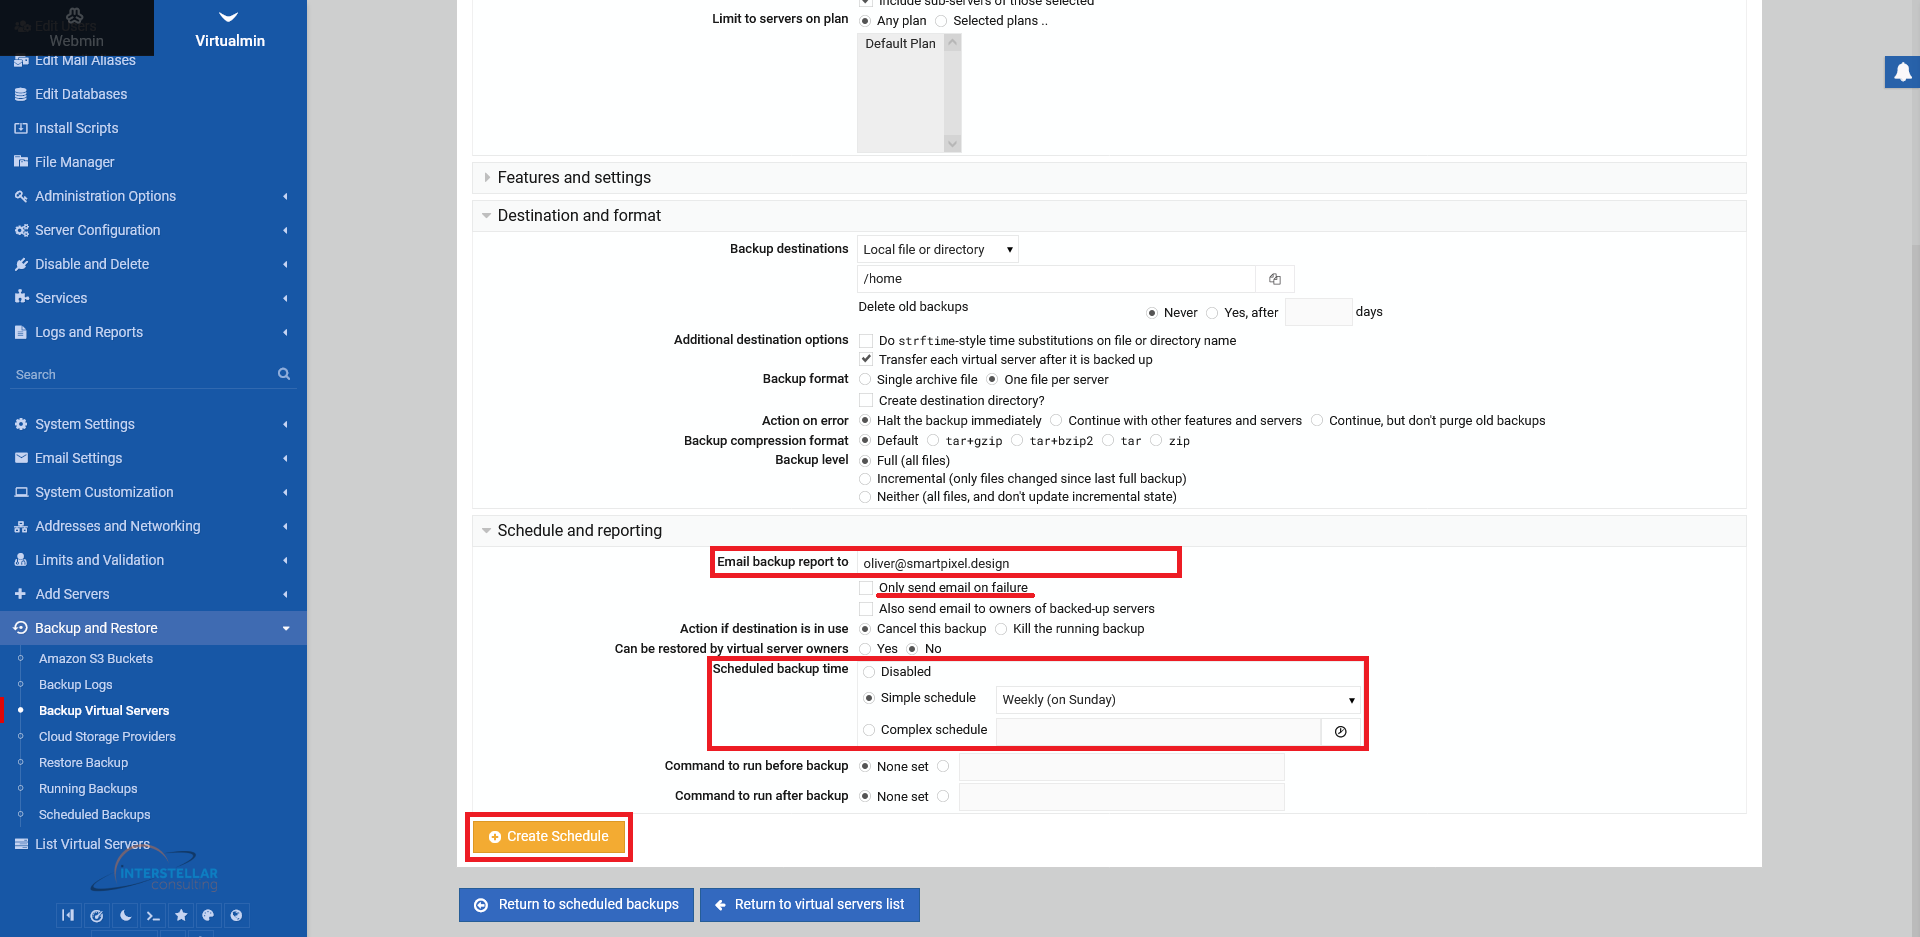
Additionally, you have to set the format and saving destination of your backup. For that go to the section "Destination and format". Choose "Backup destinations" from the drop down menu. You will have multiple options there to suite you personal preferences. Note, that you have the option, that old backups get deleted automatically after a certain time, depending on your choice.
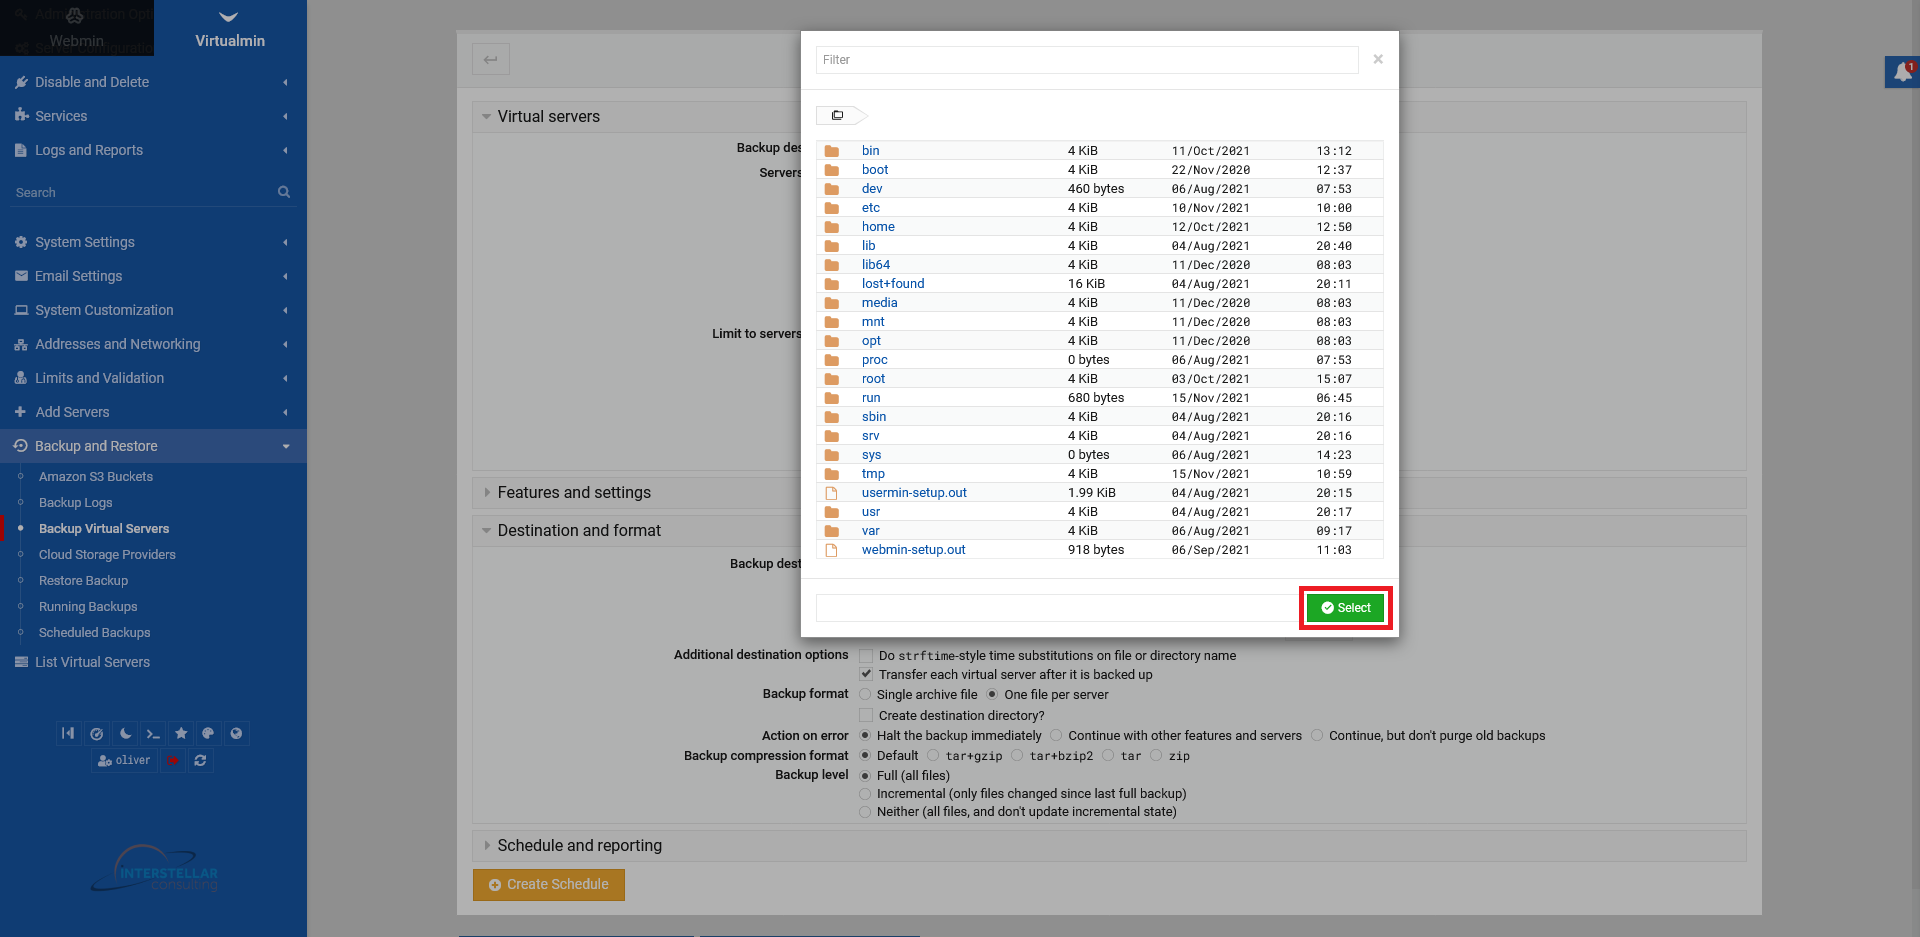
Click on the "files" icon to select a folder from the directory, if you want to save the backup in your local servers directory (see screenshot above). A pop-up window will show your local file directory. Choose a folder by double clicking on it and press "Select".
Finally, you can set an email reporting and scheduling functionality. To do that, go to the section "Schedule and reporting". Choose an email where you whish to get the backup reports to. You can choose, if you want an email notification onyl when the automated backup failed.
Most importantly, you need to setup the scheduling. You can choose a predefined "Simple schedule" from the drop down menu (e.g. hourly, daily, weekly etc.). You also can set an advanced, custom "Complex schedule" by clicking on the "clock" icon at the end of the row. There (in the following pop-up screen), you can precisely your backup schedule from the month, weekdays, up to the exact minute. After you set everything to your liking, click on "Create Schedule" in the end.
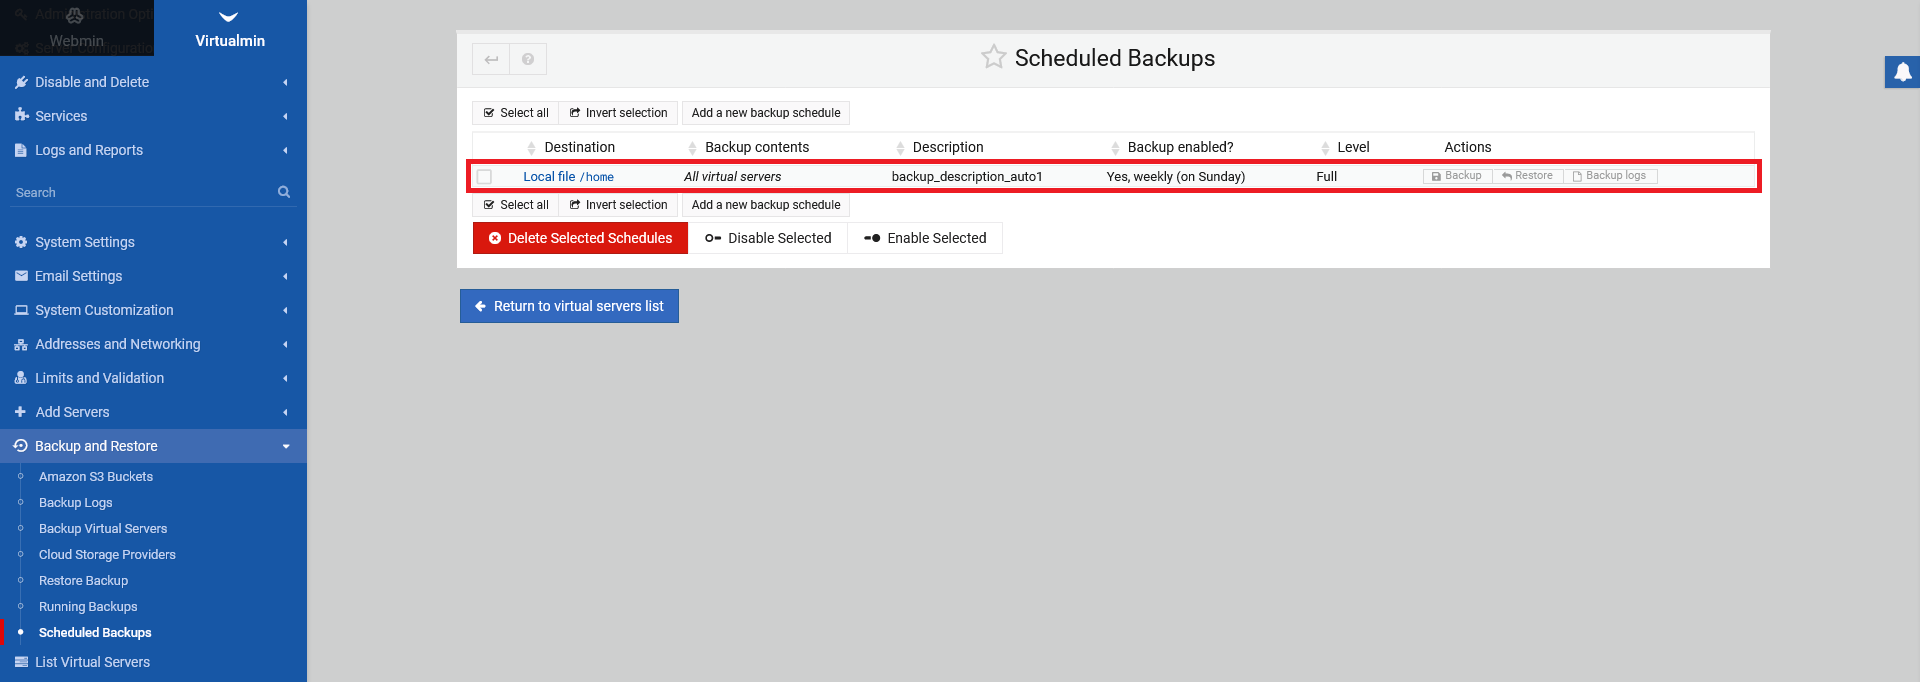
After clicking on "Create Schedule", you get forwarded to the overview screen automatically. There you should see your newly created schedule entry.