1.1 Basics
In order to use your Virtualmin server as a DNS server, it needs to be setup so that names like ns1.example.com and ns2.example.com can be input as a domain's nameservers.
For that to work -- you first have to go to the domain name registrar for example.com, and register your server as a nameserver. It's usually as simple as inputting two or more names (such as ns1.example.com and ns2.example.com), and the IP addresses that are associated with them.
How to accomplish that is different for every domain name registrar. Namecheap is a popular registrar, and performing that task with Namecheap is documented here: http://www.namecheap.com/support/knowledgebase/article.aspx/768/10/how-do-i-register-private-nameservers-for-my-domain
GoDaddy is also popular, and they provide instructions for accomplishing that here: http://help.godaddy.com/article/668
After registering your nameservers at your domain name registrar -- you'll want to log into Virtualmin, select your "example.com" domain, click Server Configuration -> DNS Records, and create a new "A - IPv4 Address" record for ns1.example.com and ns2.example.com.
1.2 Virtualmin setup
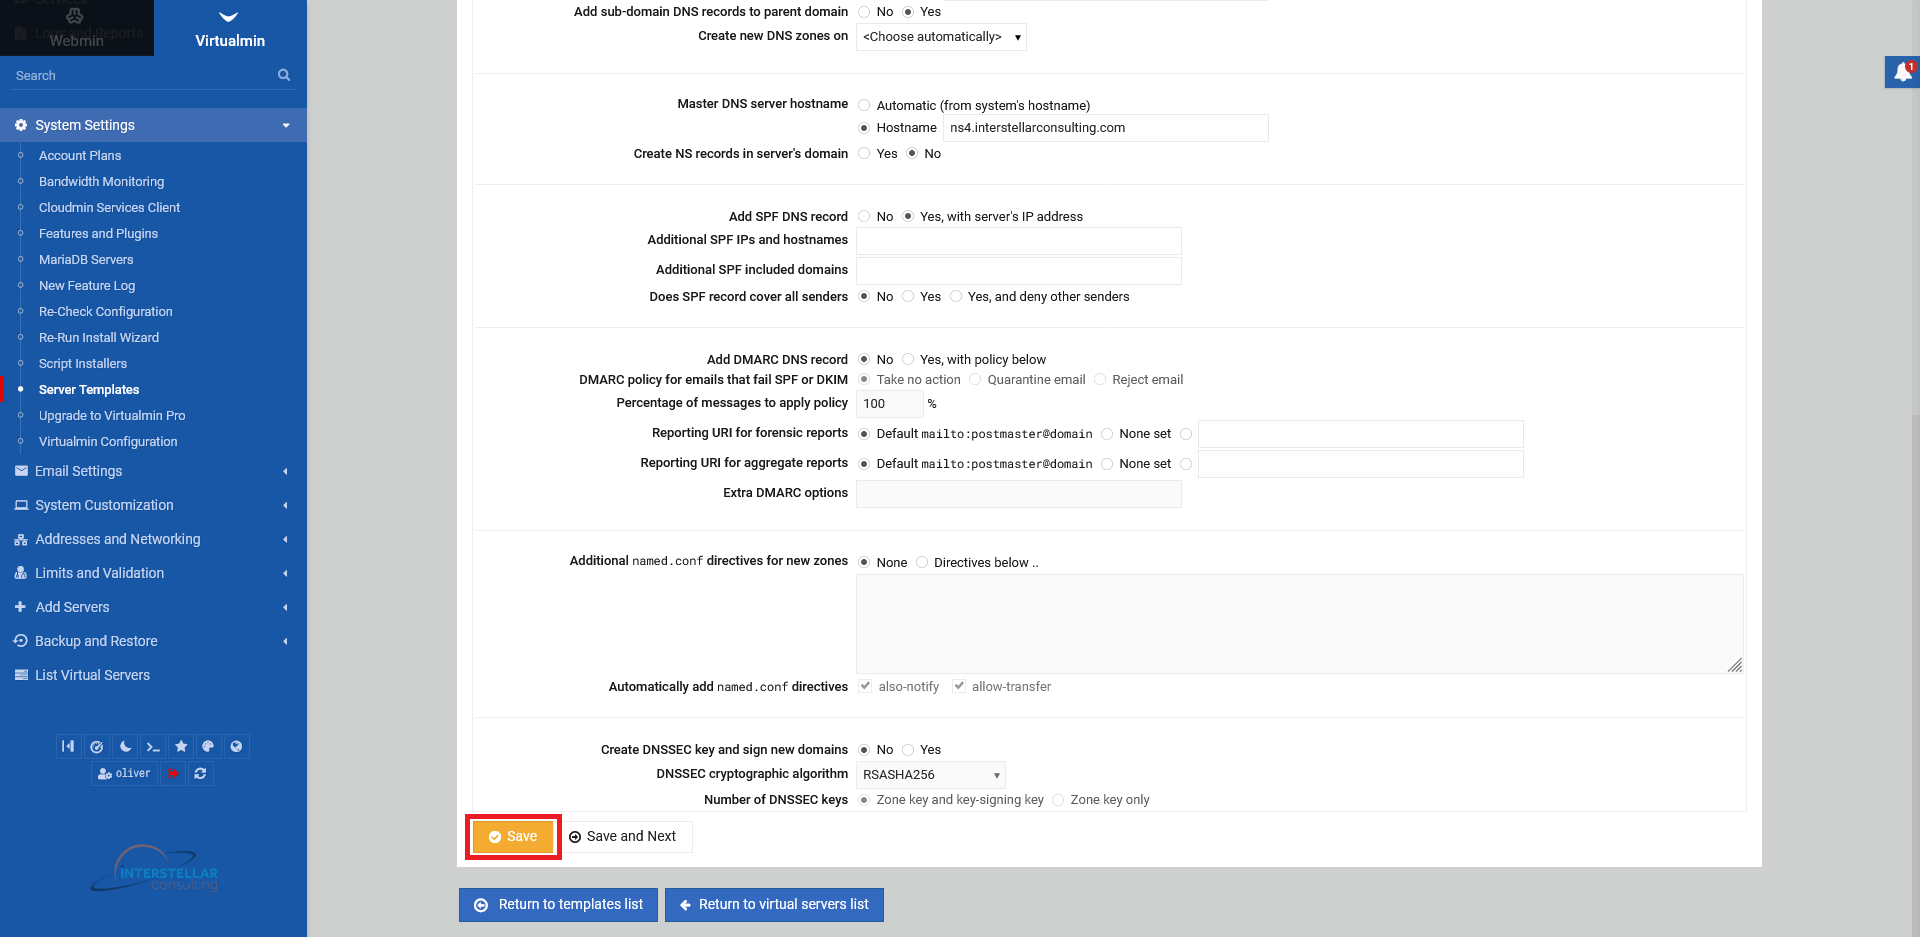
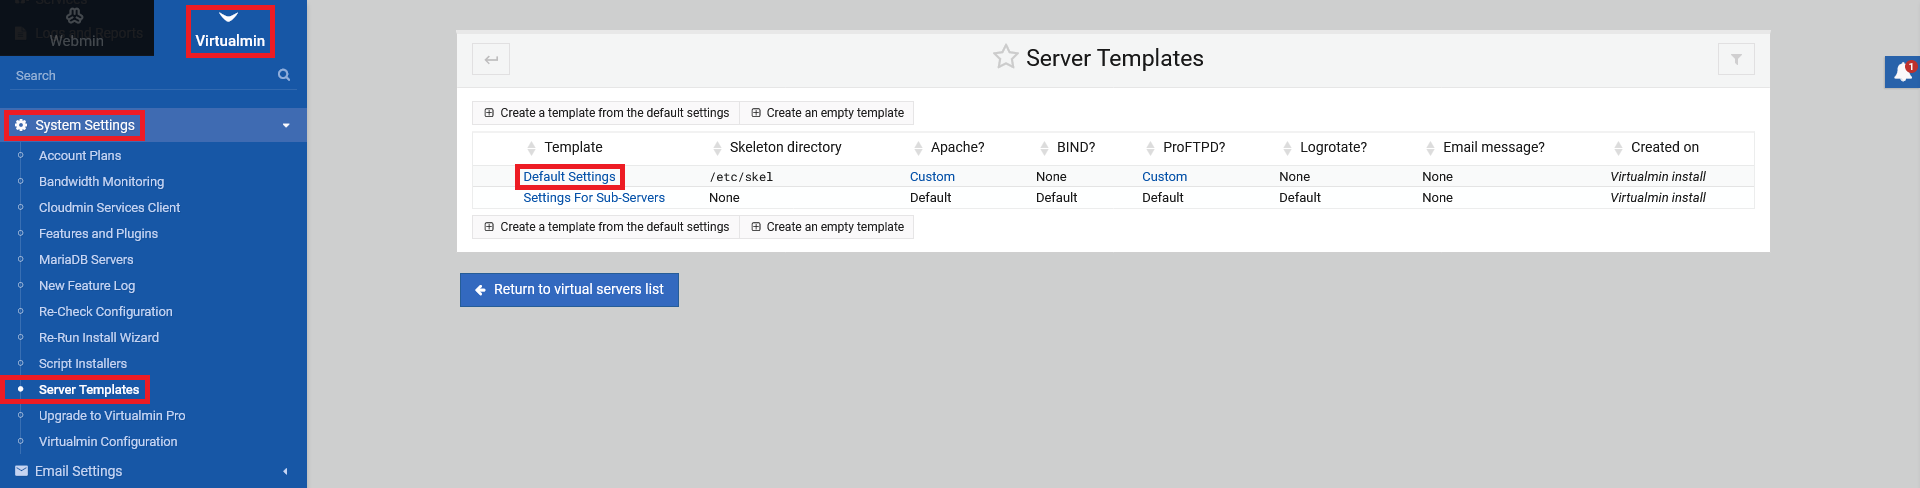
Lastly, you'll want to tell Virtualmin to use your nameservers when it generates NS records for new Virtual Servers that it creates. You can do that by going into "System Settings -> Server Templates -> Default Settings".
Next, choose "BIND DNS Domain" from the drop down menu. Set the "Master DNS server hostname" accordingly to what you have set at your registrar.
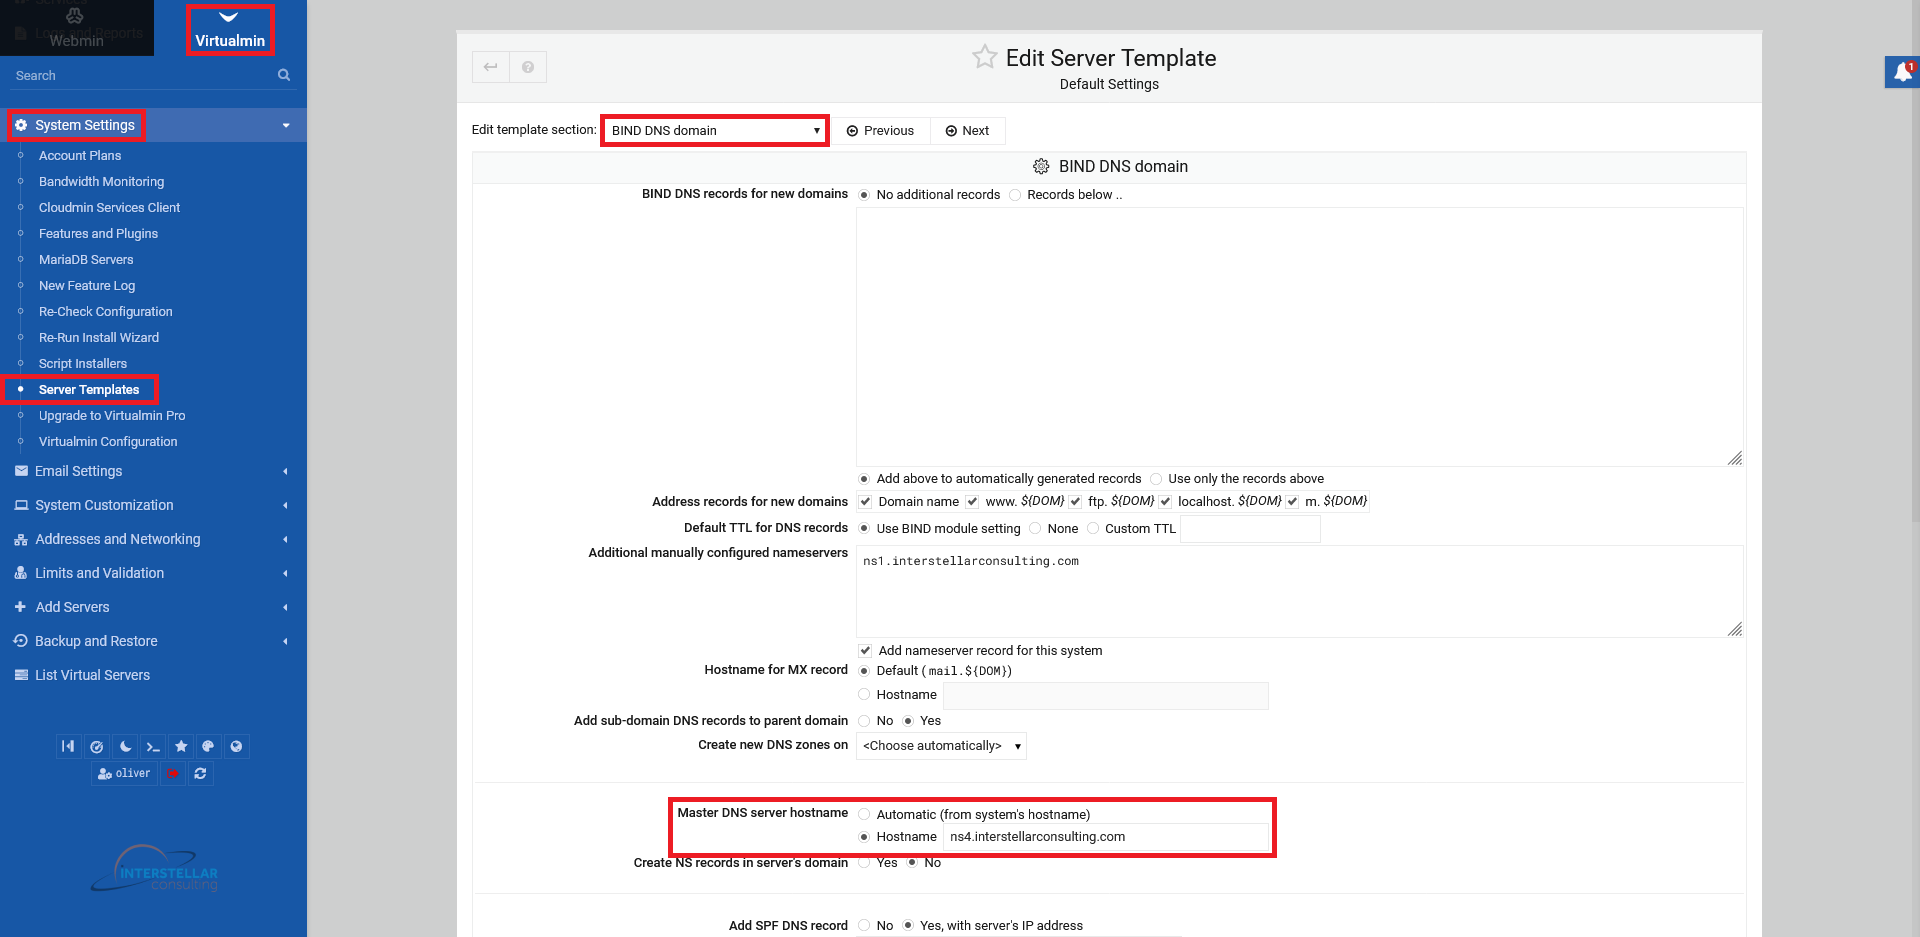
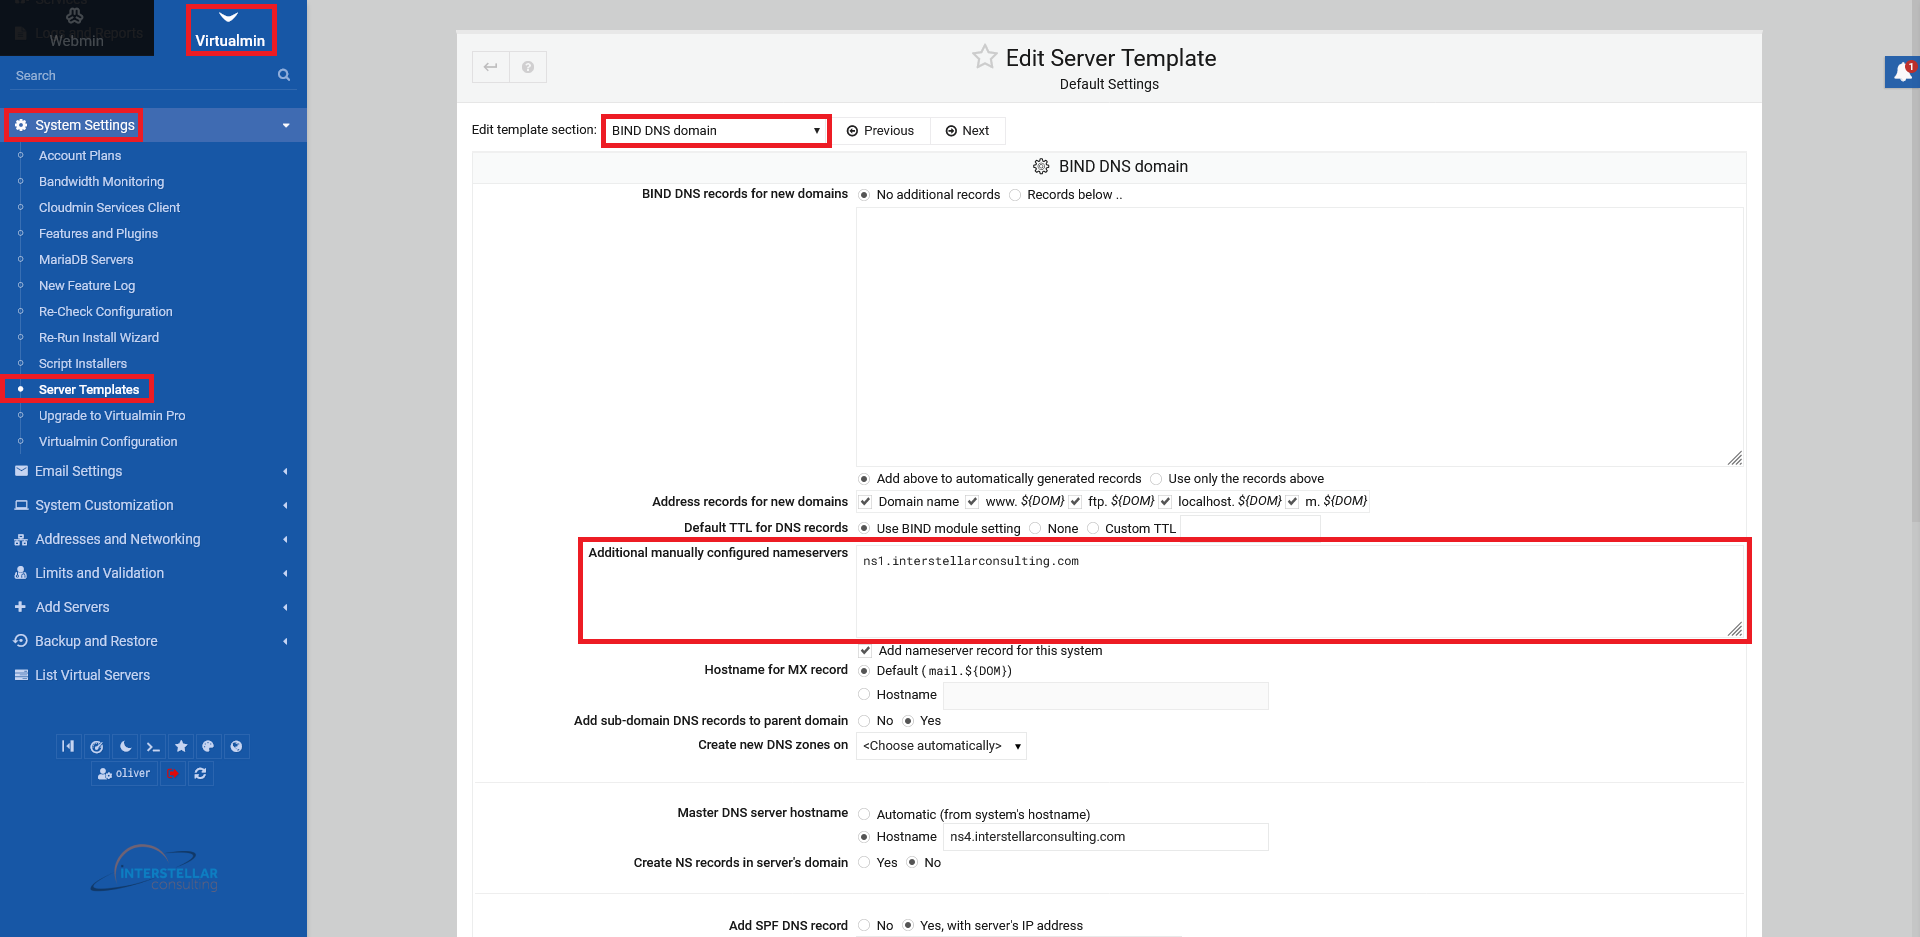
Additionally, set "Additional manually configured nameservers".
Click "Save" in the end.