2.1 Creating new directory, new file and new archive
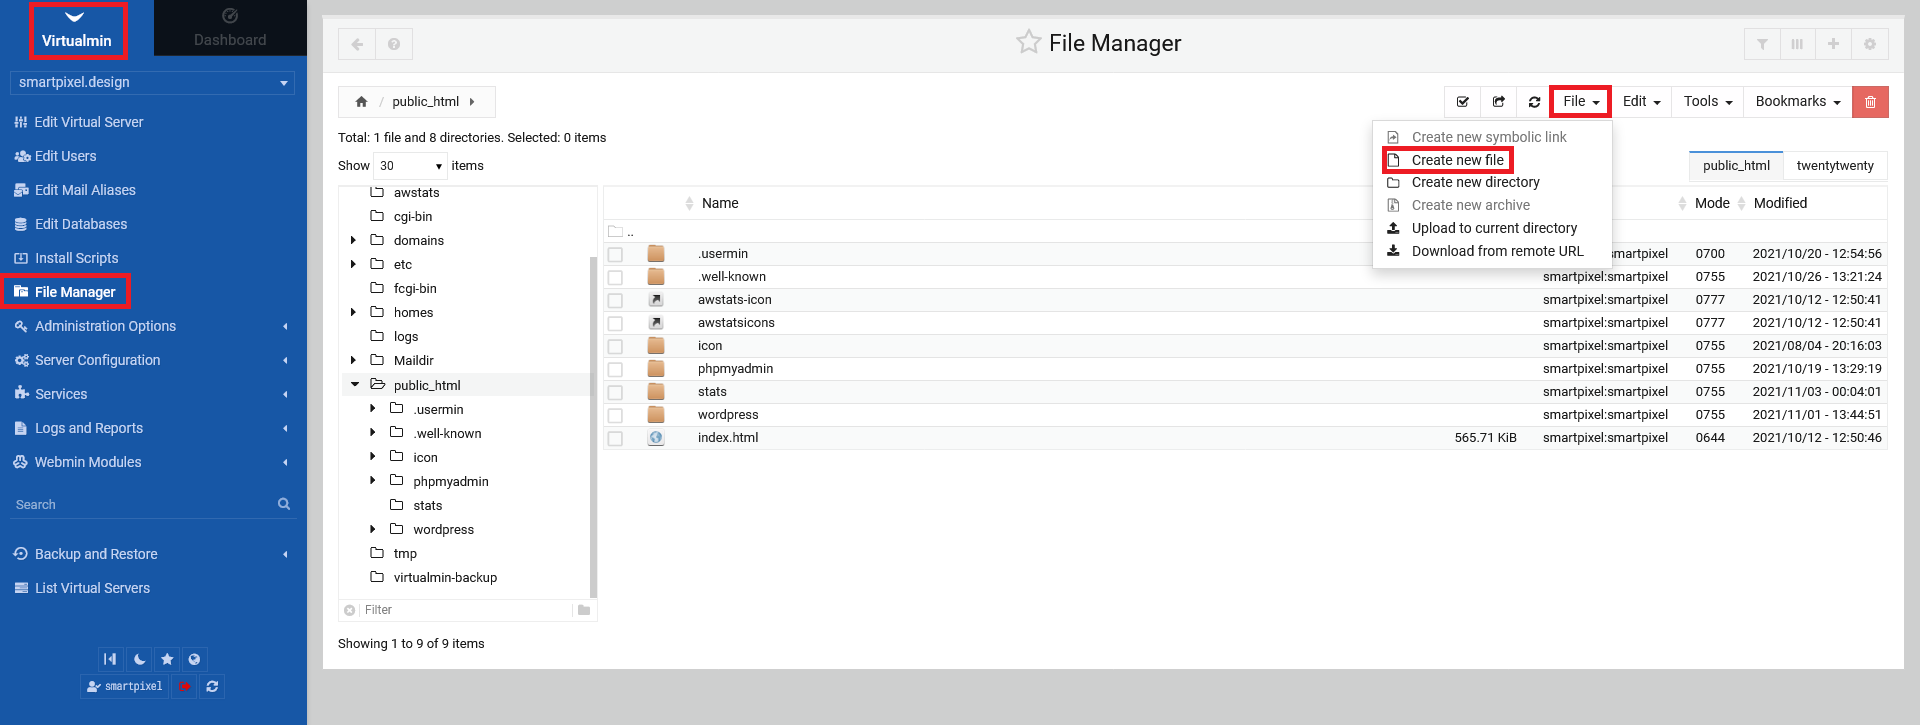
You can create any file/file format you want withing the file manager/your server directory. Go to your file manger in your left side menu and click on the option "File" in the top right corner menu. Select "Create new file".
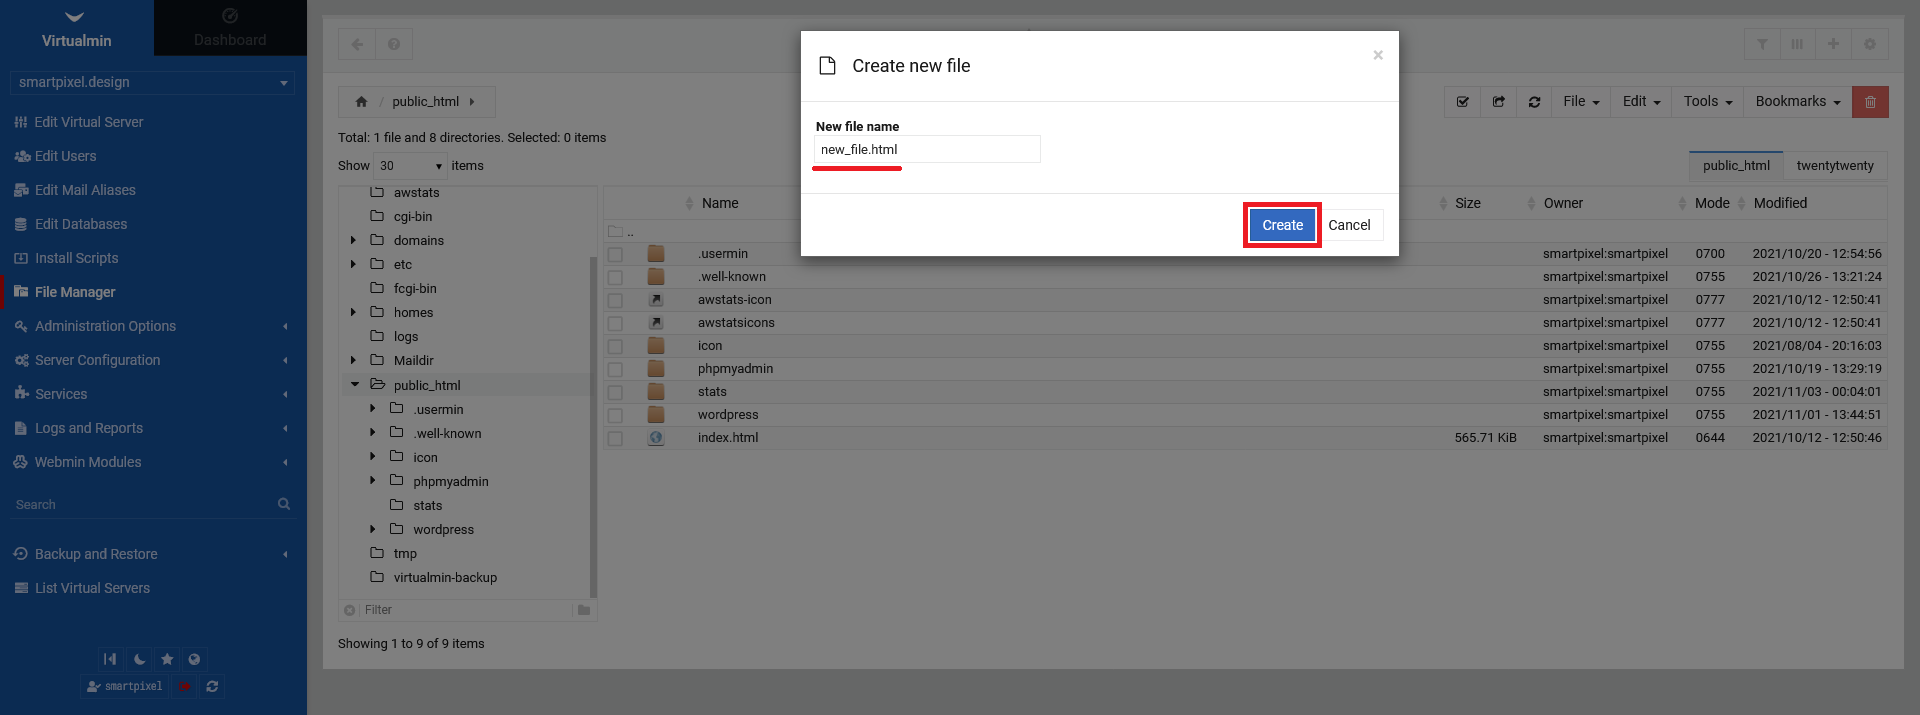
Give your file a name and click "Create". You can specify the file format at this stage already (e.g. ".html").
After letting Virtualmin create your new file, a terminal based text editor will open automatically. You can type in your desired content. Dont forget to save your file by clicking the red "floppy" icon in the top right corner of the terminal window.

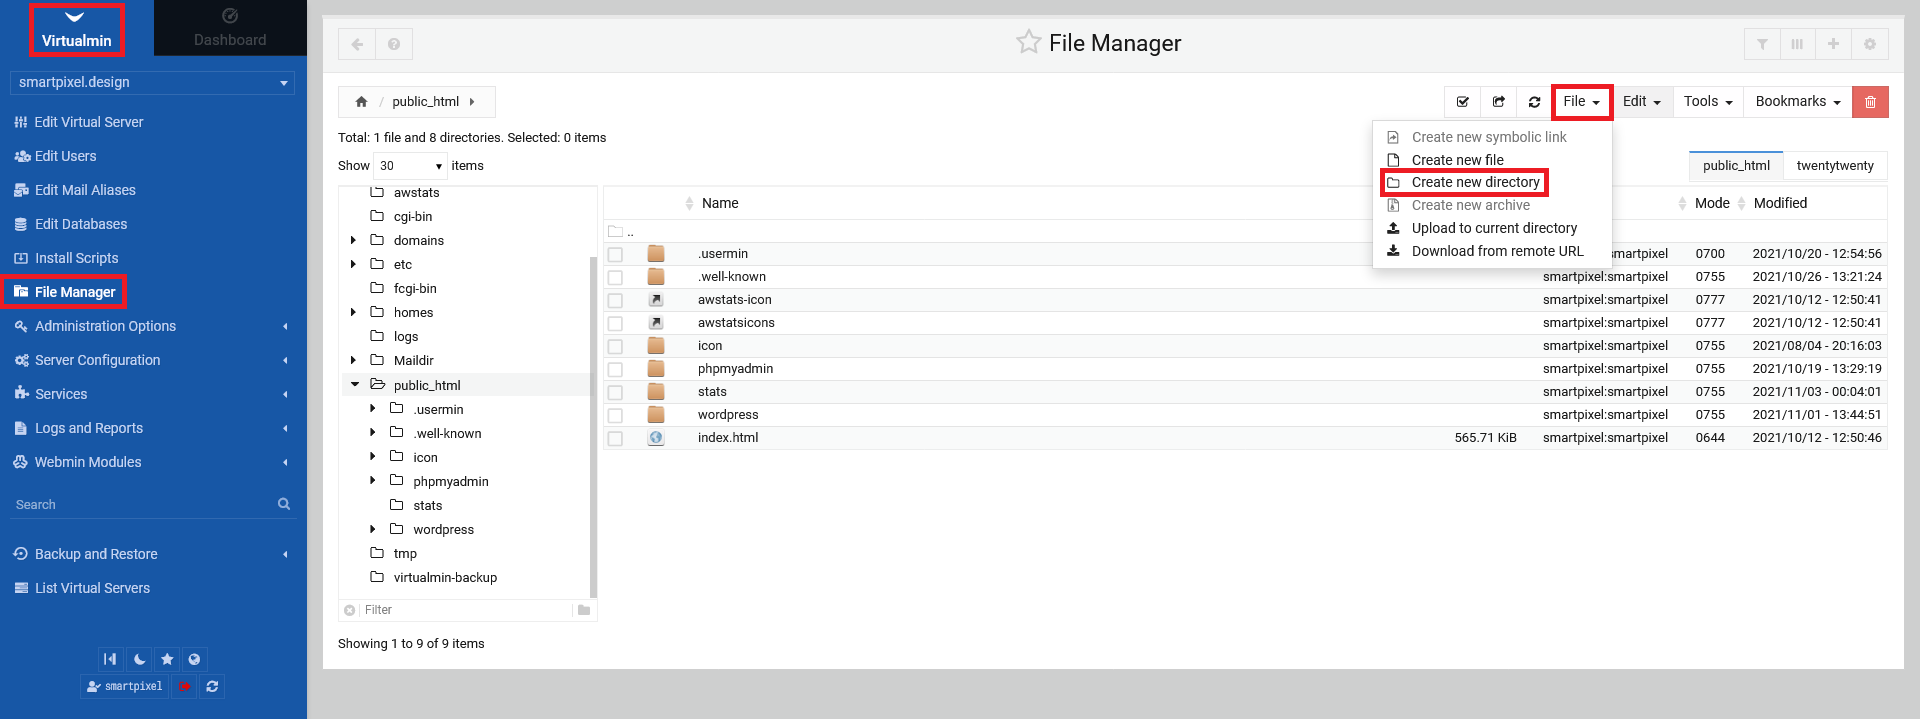
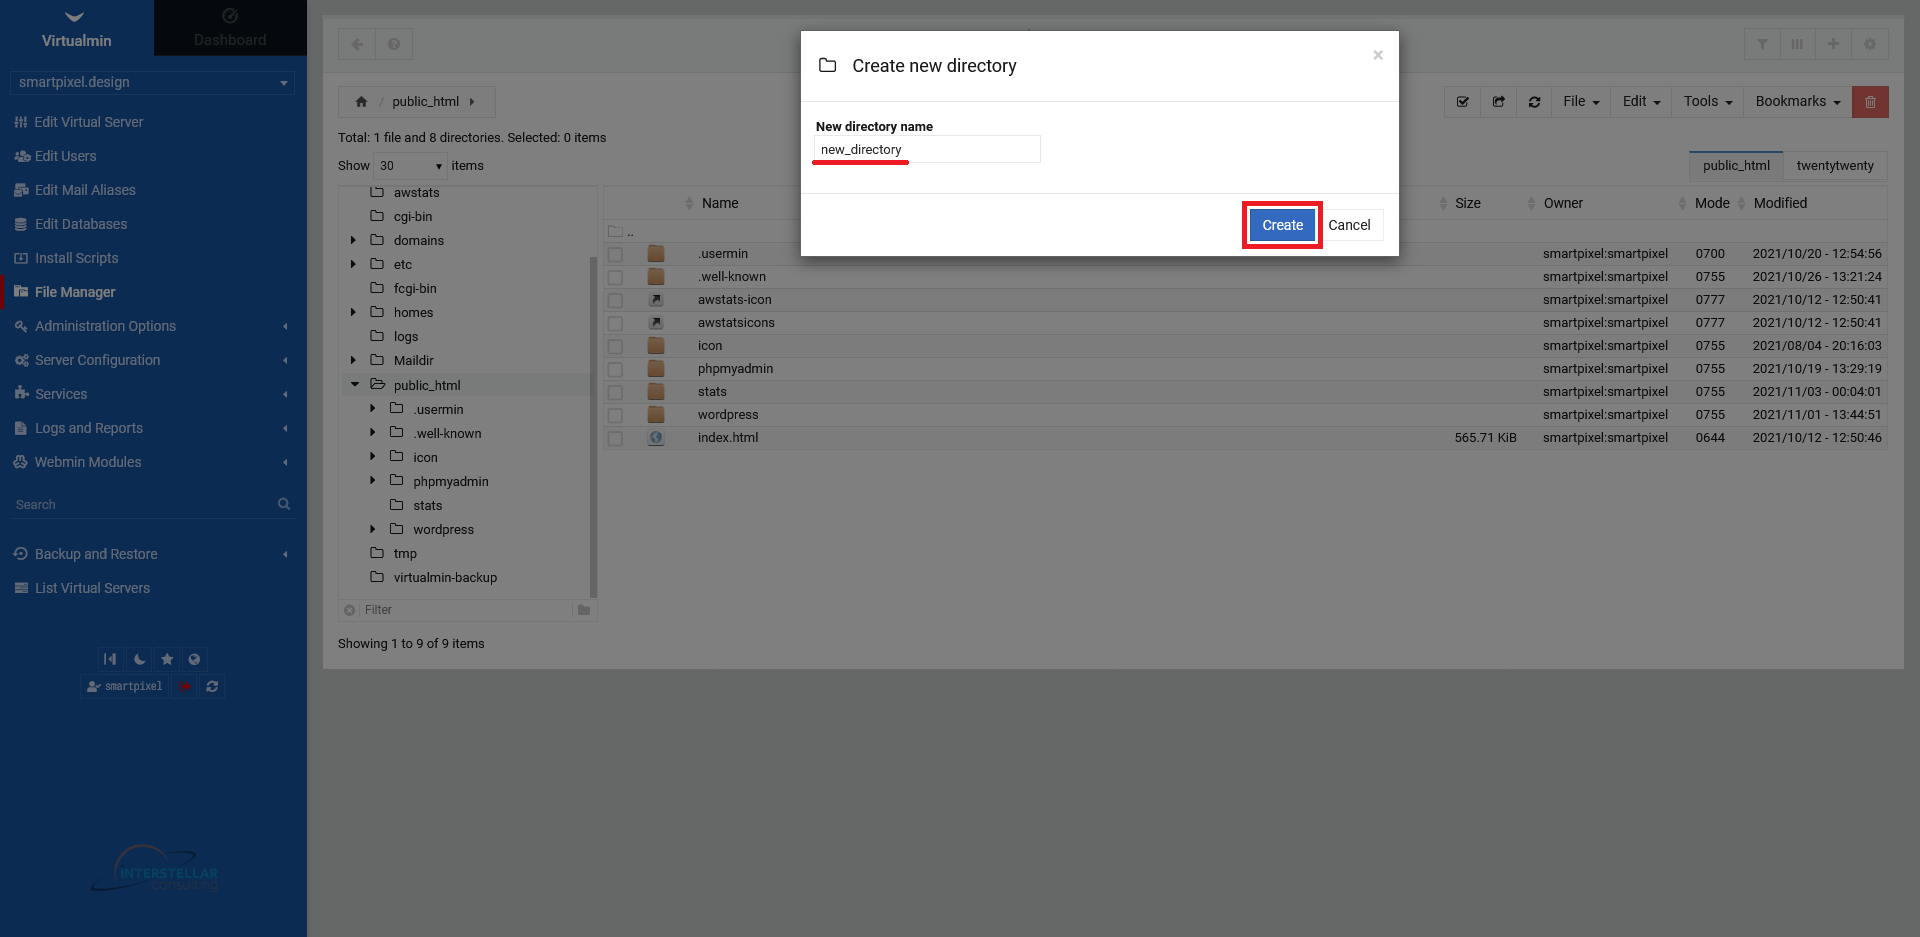
To create a new directory within your directory structure, go to your file manger in your left side menu and click on the option "File" in the top right corner menu. Select "Create new directory".
Give your directory a name and click on "Create". Afterwards, you should see your new directory in your list.
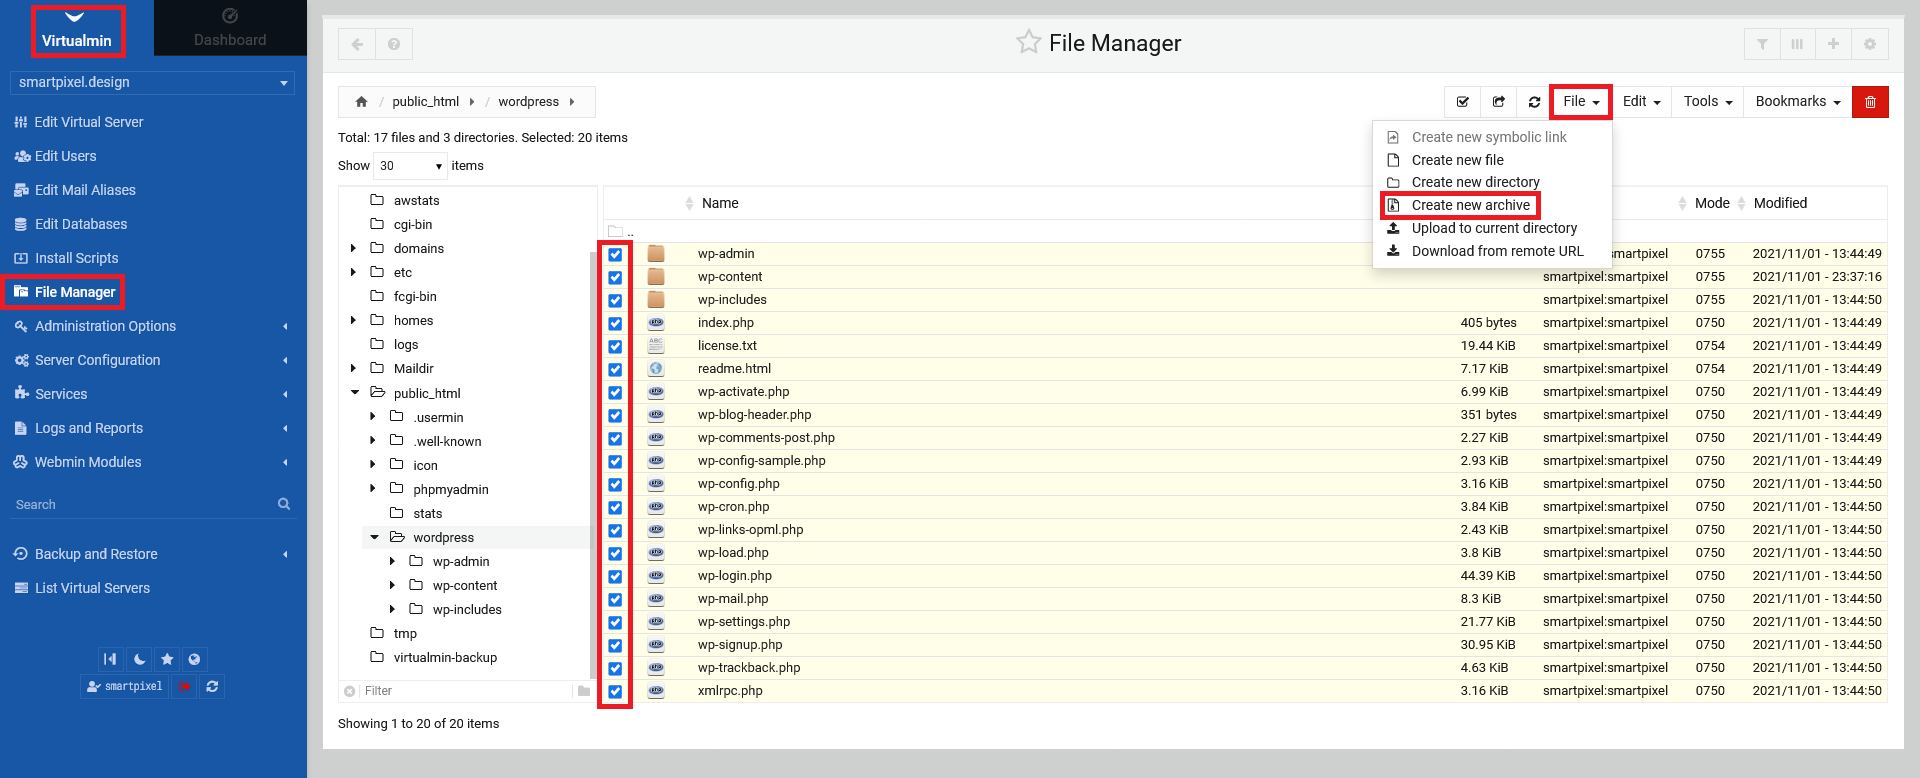
Lastly, to create a new archive, you need to go to your file manager again and select what you want to archive, by clicking the radio boxes next to the directory entries. Click than on "File" in the top right corner and select the option "Create new archive".
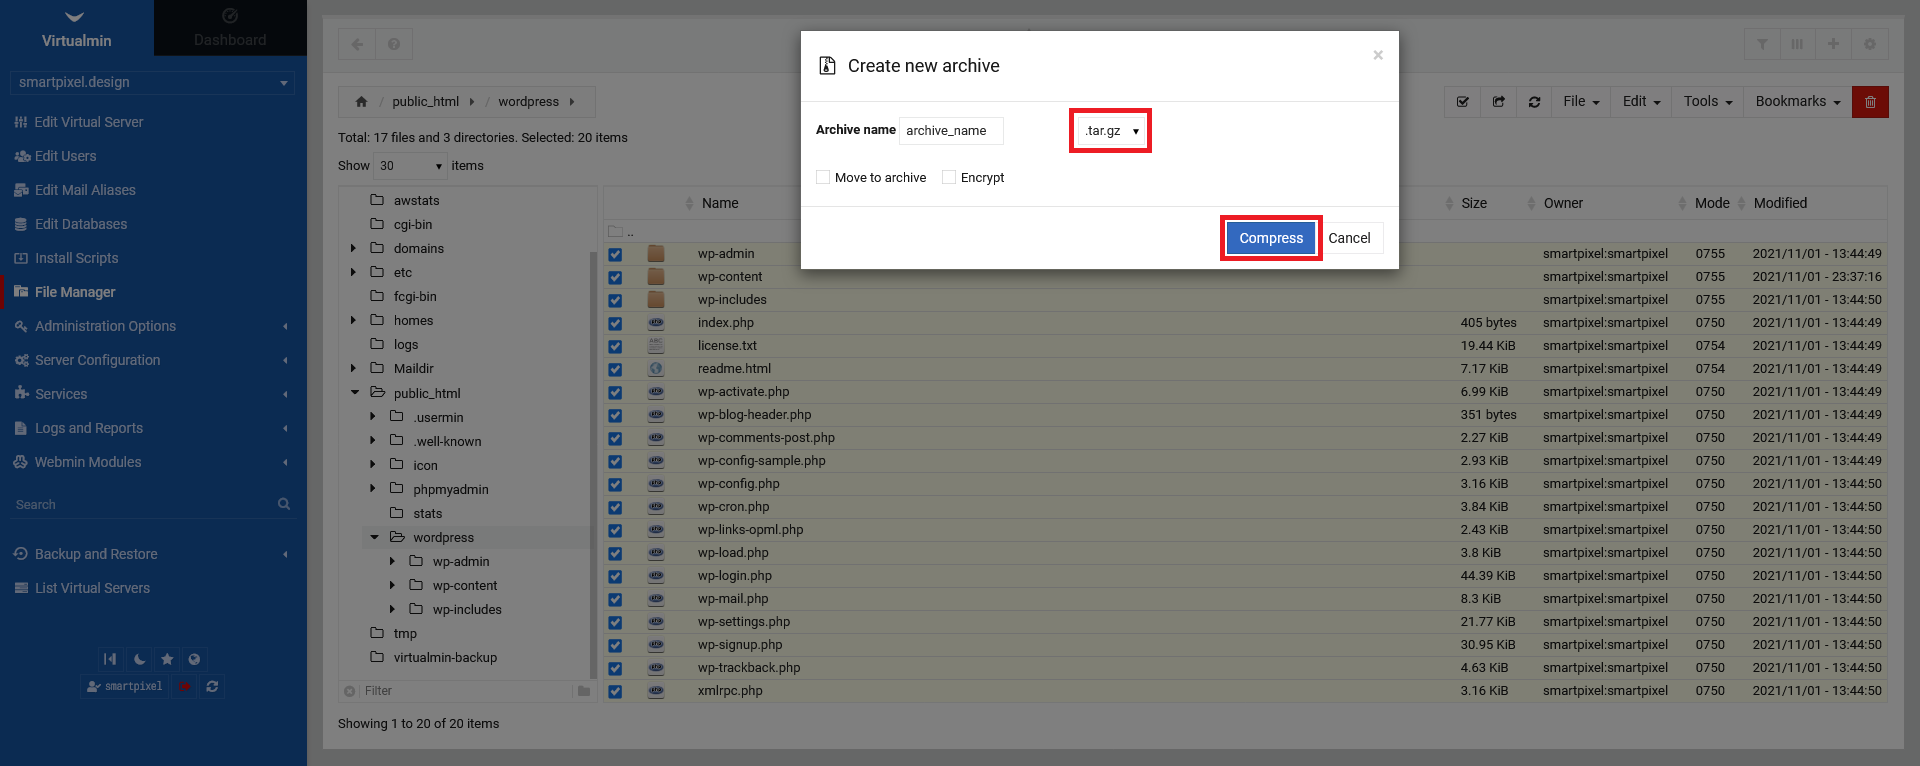
Choose a name, the compression type from the drop down menu and wether you want to move it to an archive or encrypt your new archive. Click "Compress" in the end.
2.2 Uploading and downloading options
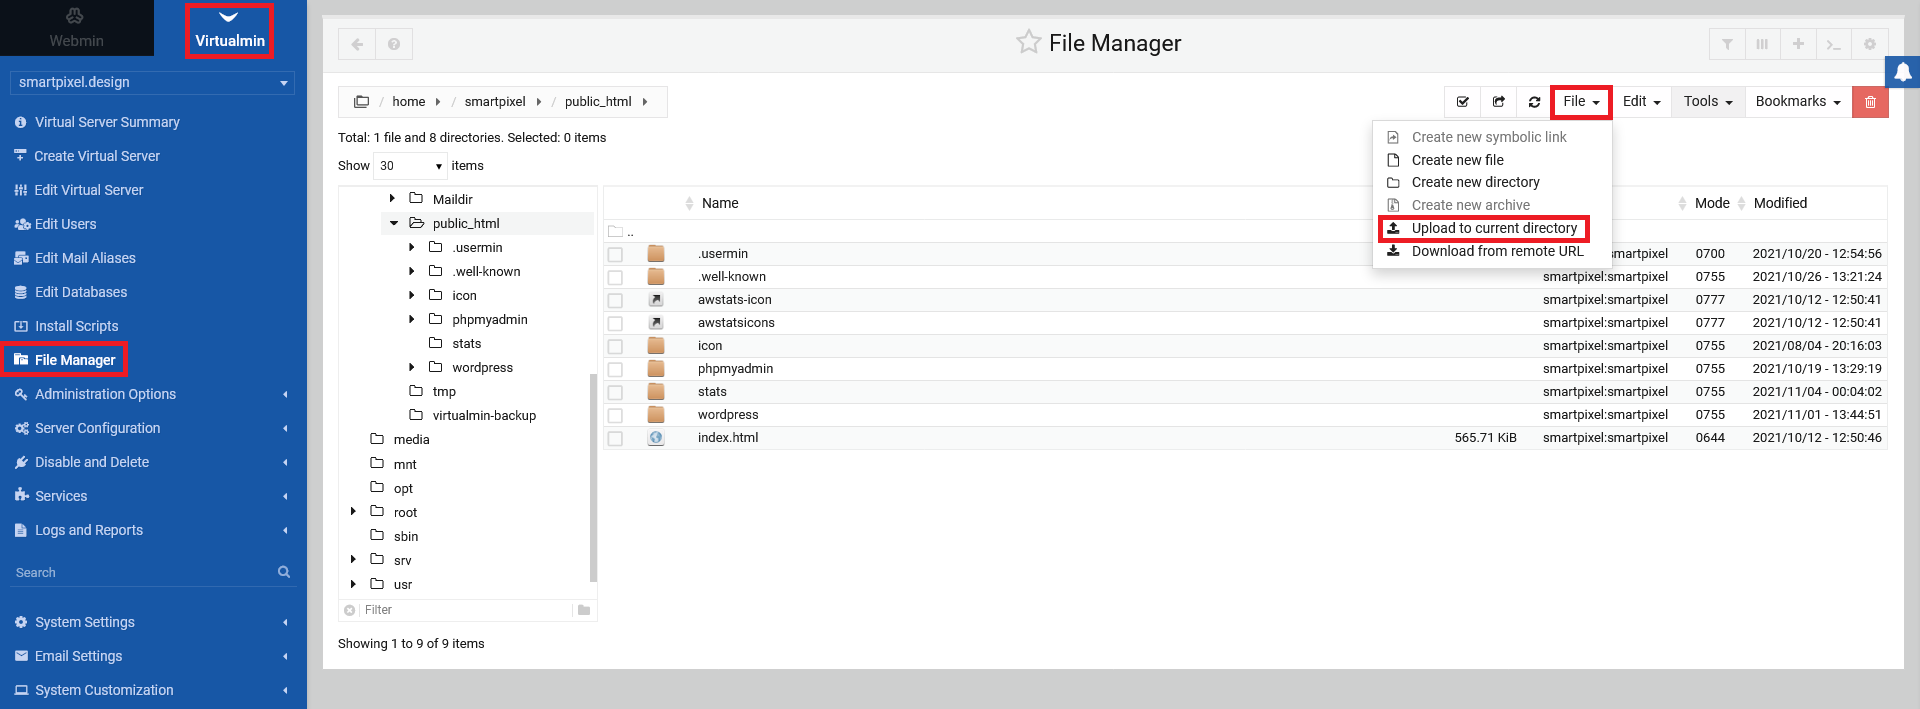
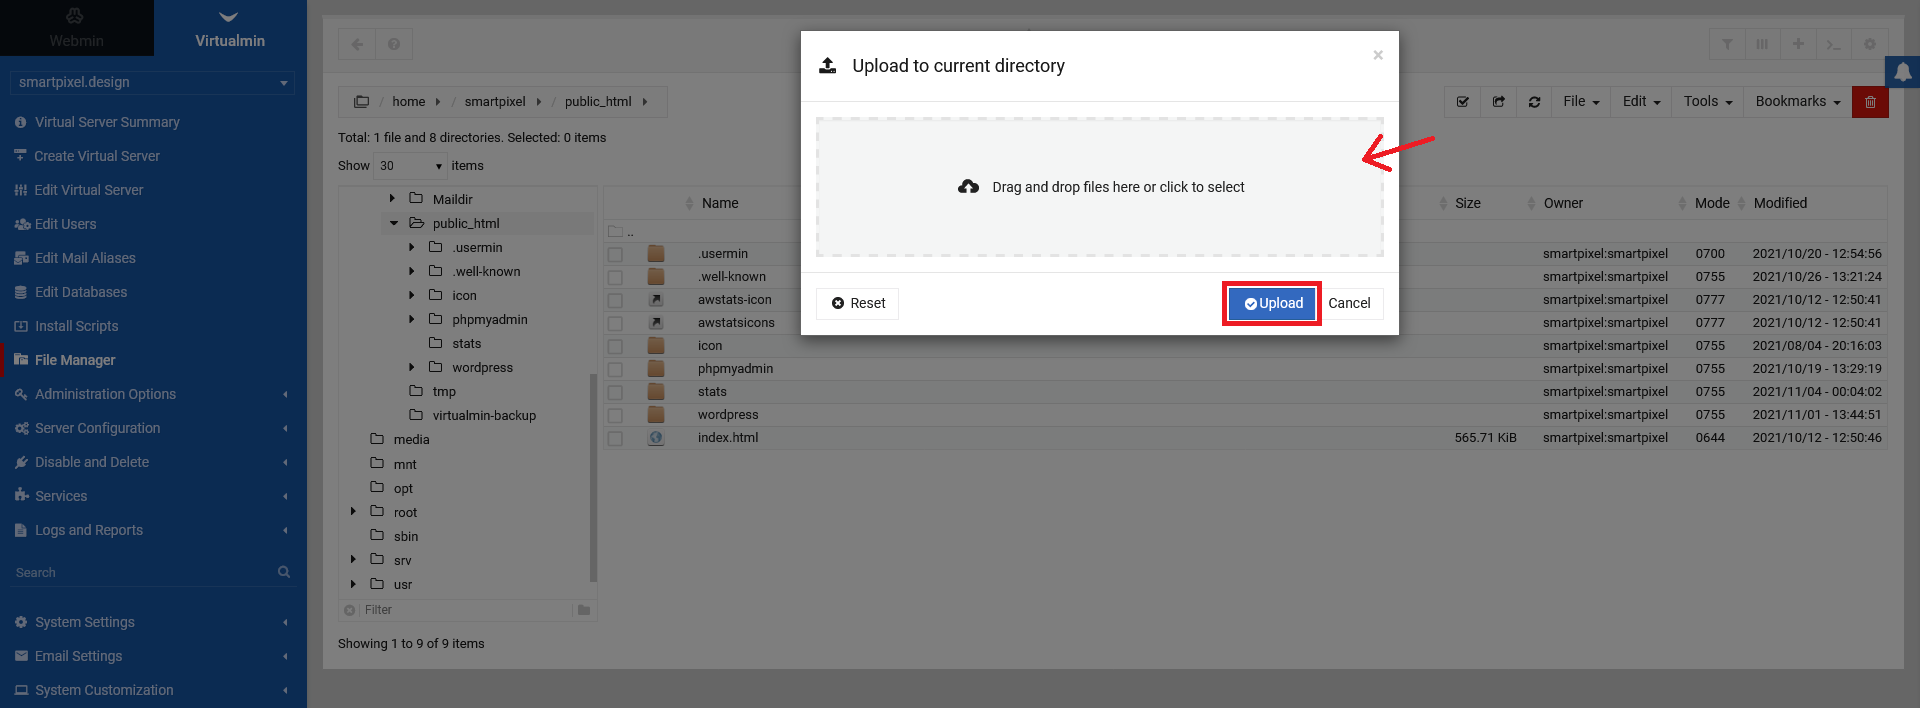
To upload a file to your current directory (assuming you are in your Virtualmin file manager), click on "File" in the top right menu and select "Upload to current directory".
In the upcoming screen, simply drag the item into the middle box and click "Upload". The file should appear now in your directory.
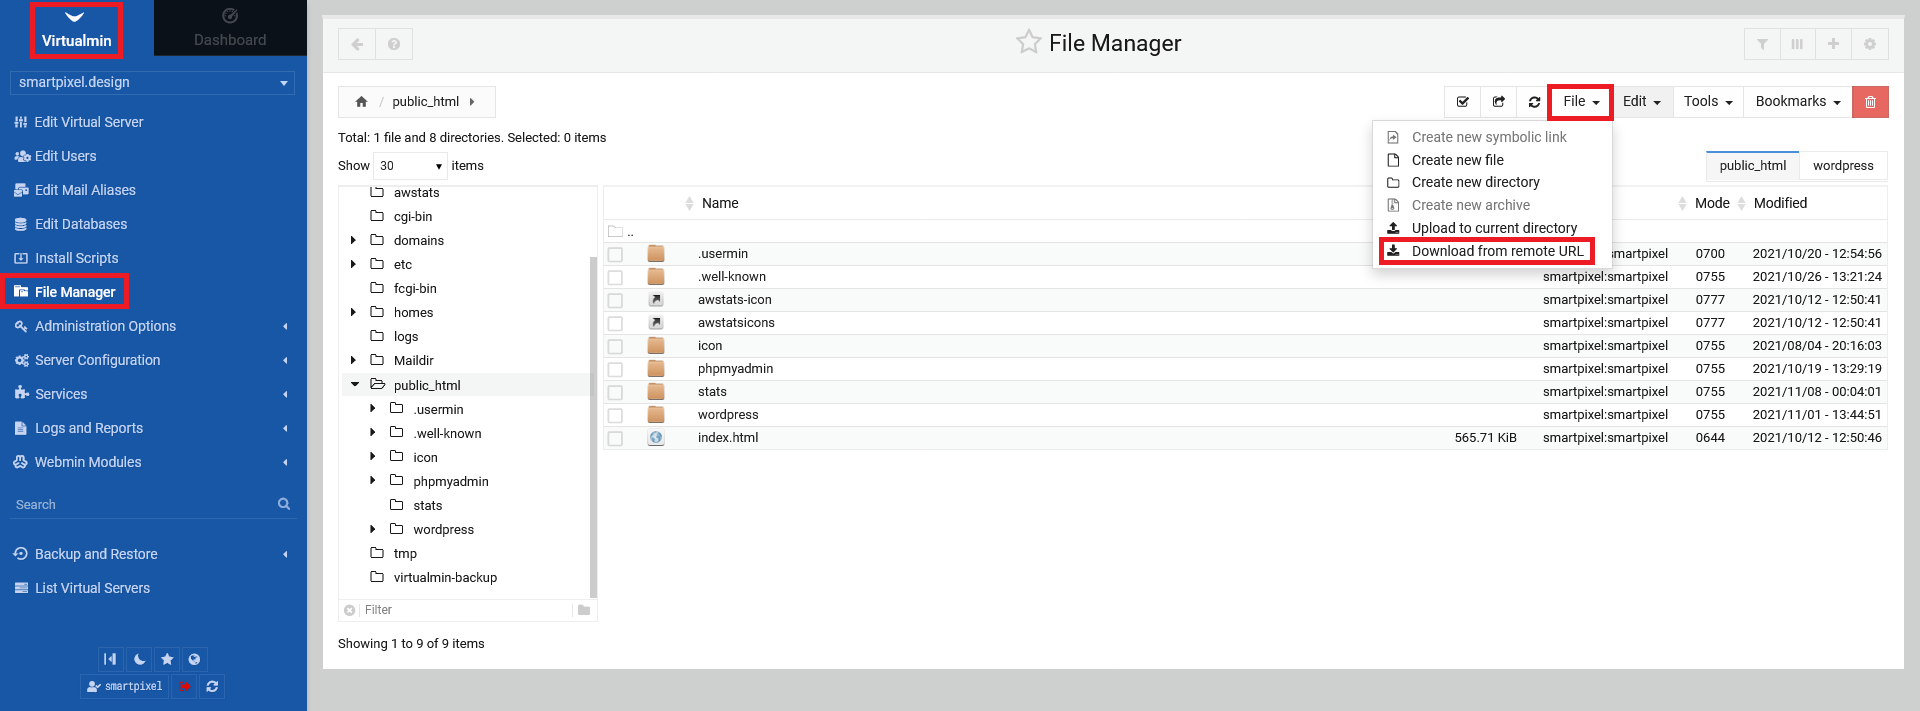
To download a file from a remote URL, click on "File" in the top right menu and select "Download from remote URL".
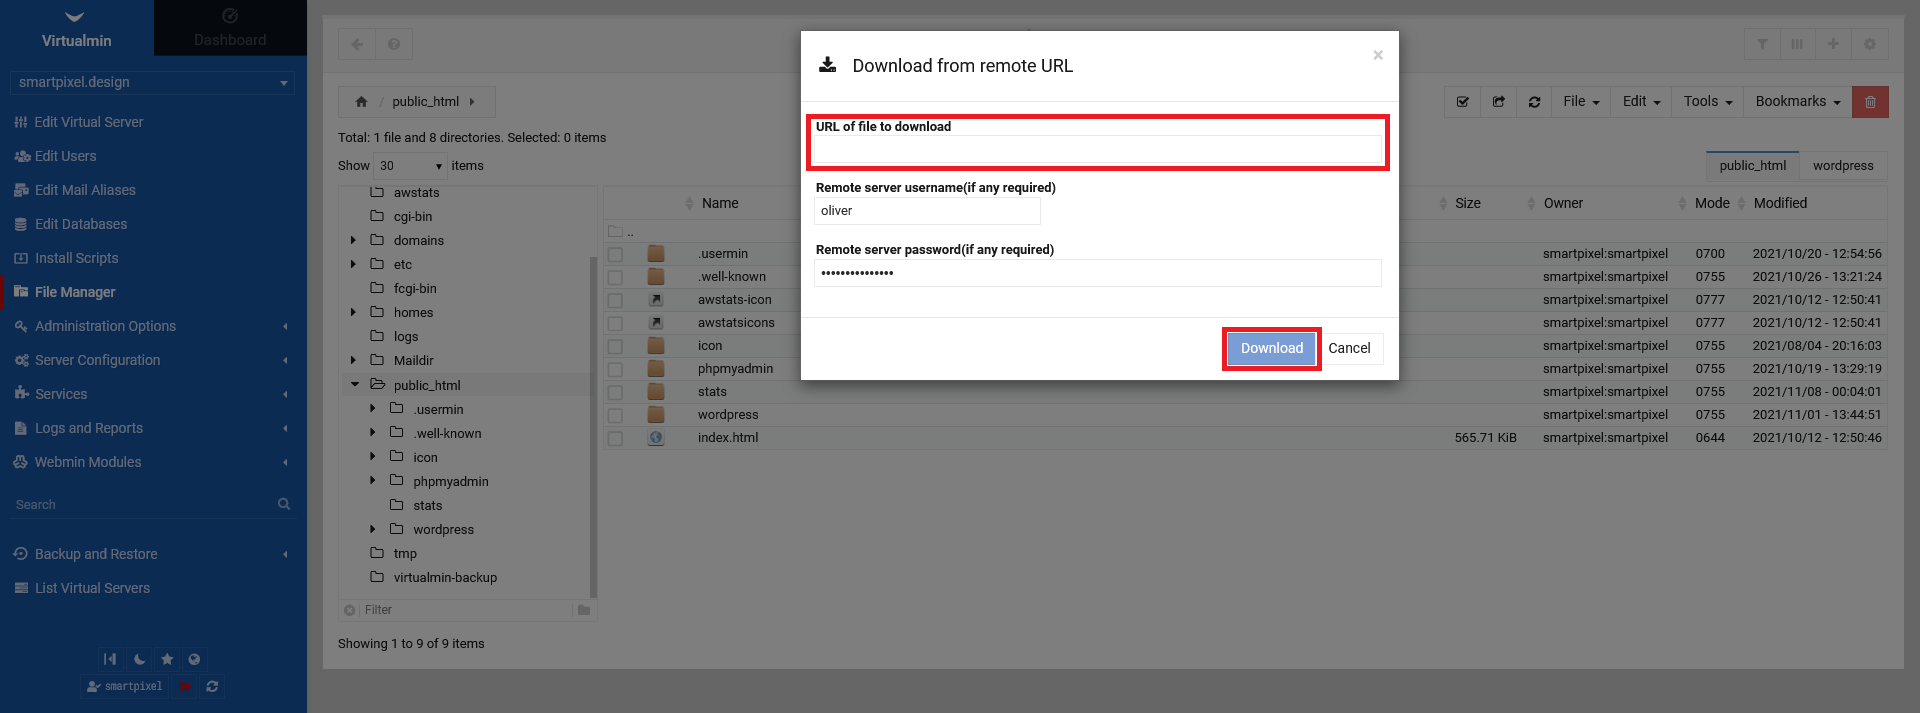
After that, fill in the necessary URL. The username and password are present automatically. Click "Download" to download your file.
2.3 Permissions, ownership and attributes
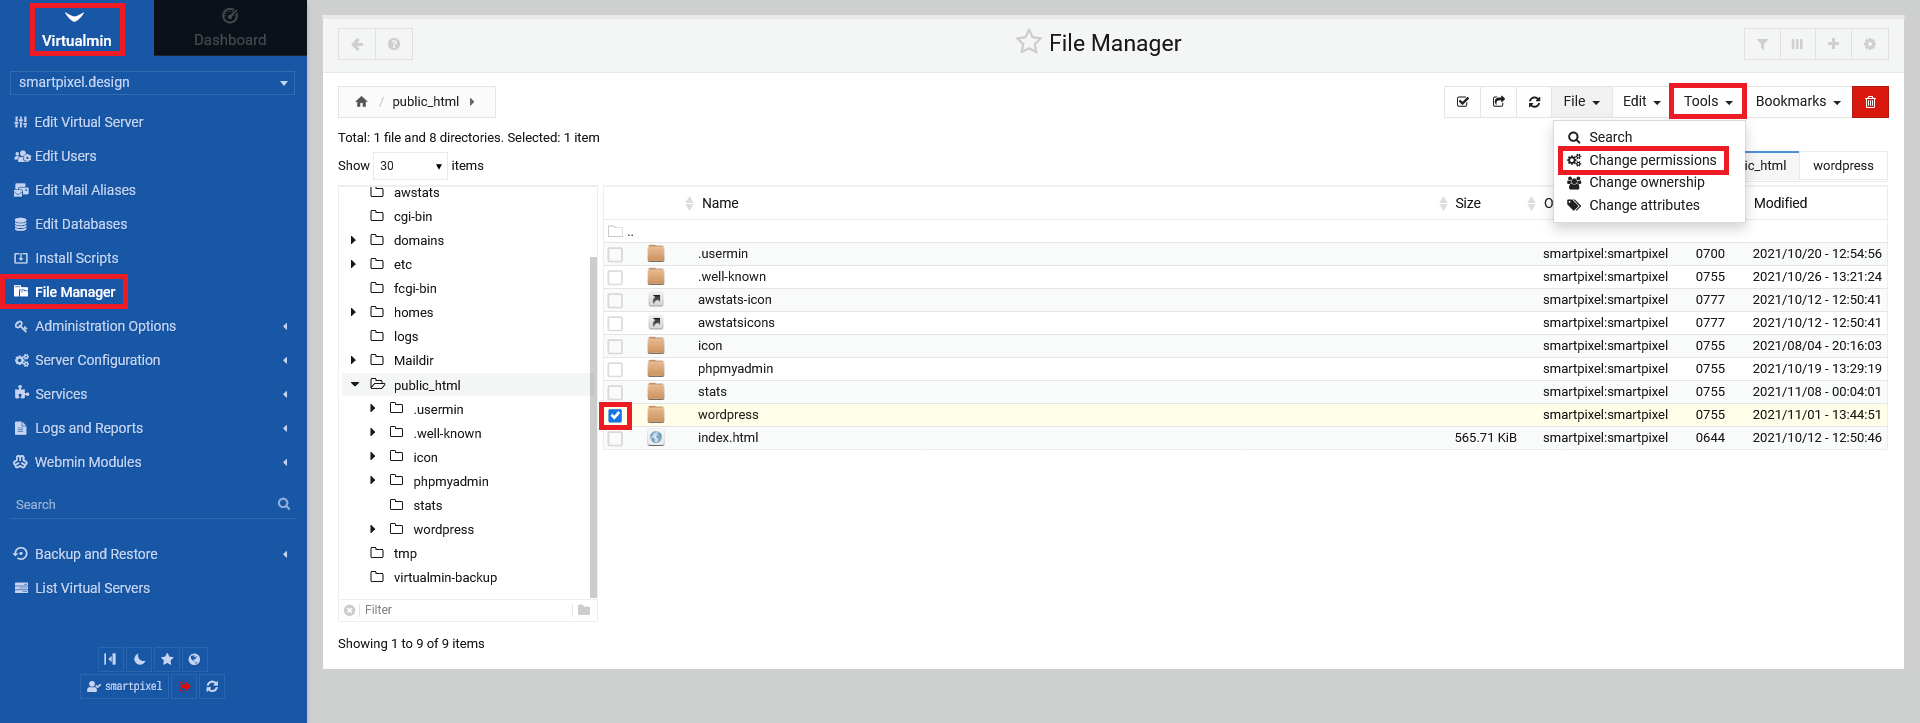
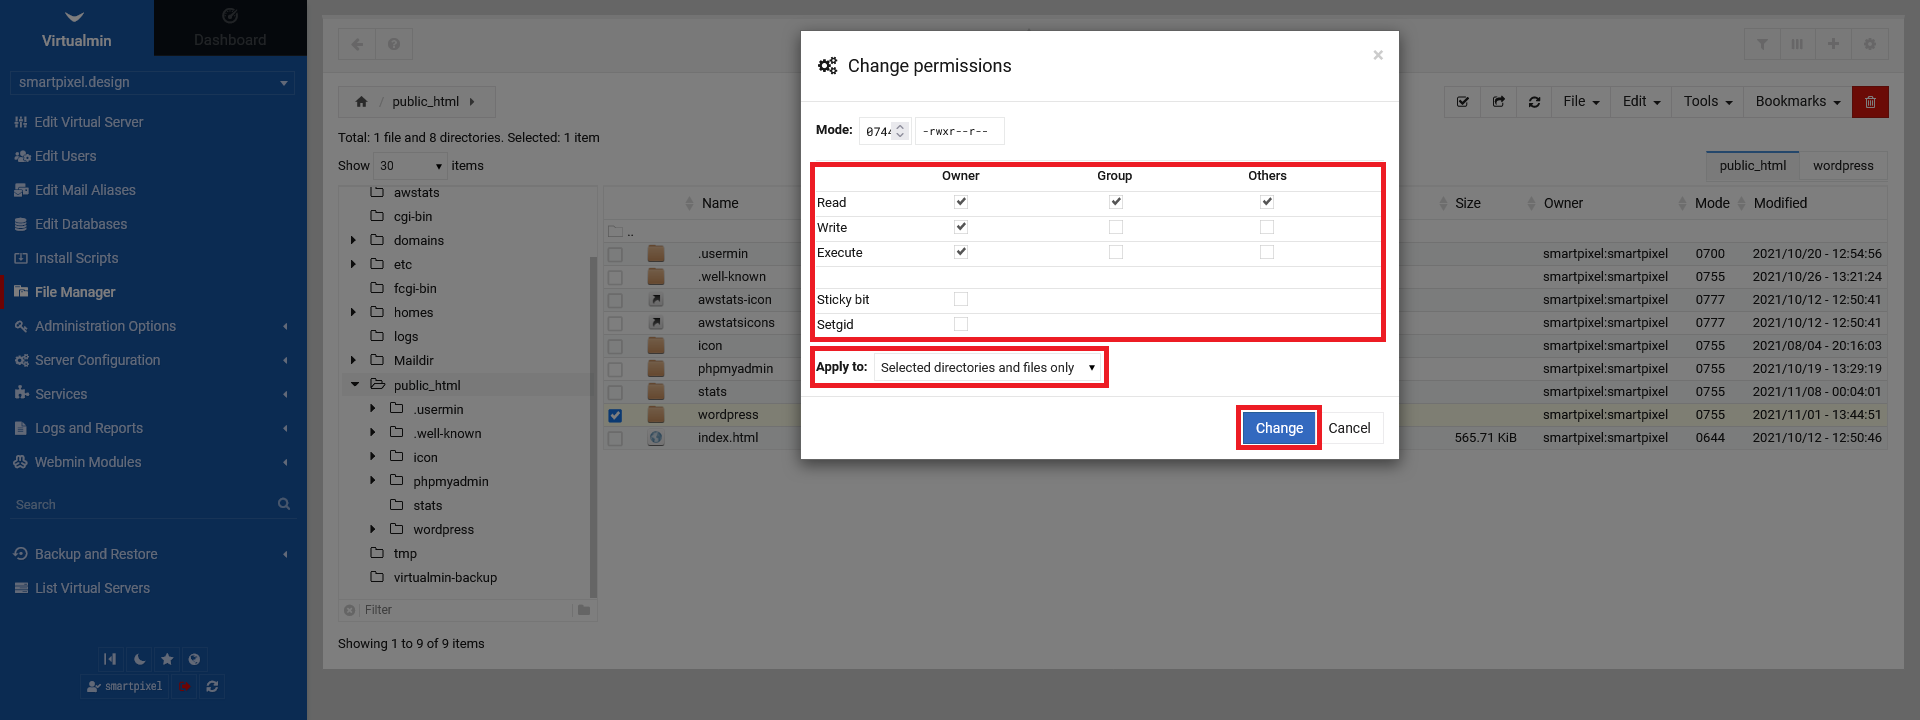
To change permissions, choose a file or directory by clicking on the radio box left of it, click on "Tools" in the top right menu and select "Change permissions", assuming you are still in the Virtualmin file manager.
Now, choose the permissions you want to setup by clicking on the respective radio boxes and select to where it should "Apply to" from the drop down menu. Click "Change" in the end.
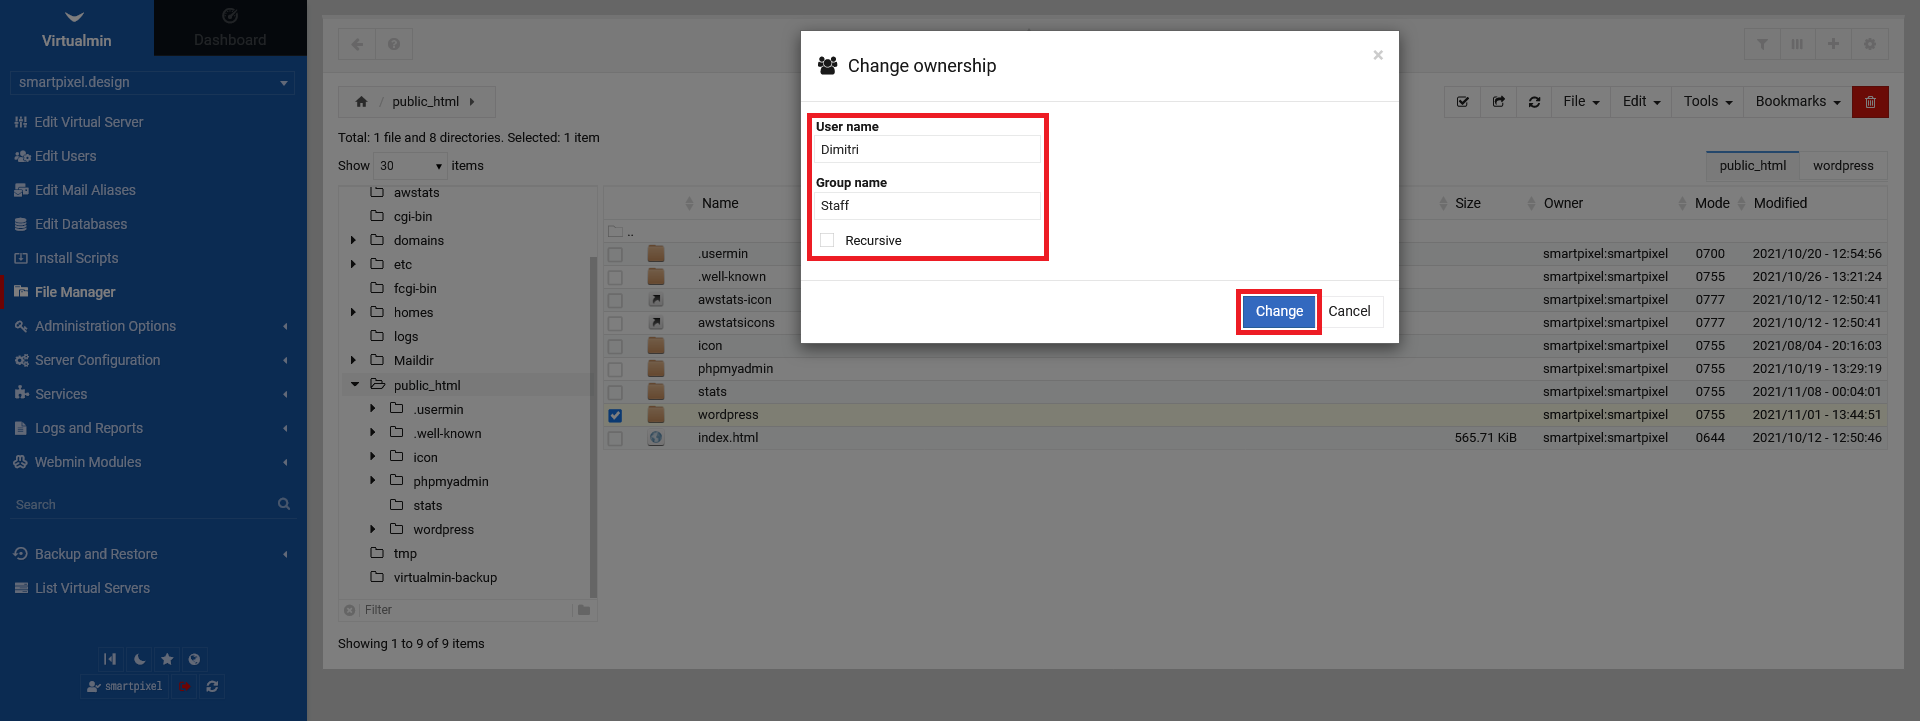
To change the ownership of files and directories choose a file/directory by clicking on the radio box left of it, click on "Tools" in the top right menu and select "Change ownership".

In the following pop-up screen, type in the "User name" and "Group name" and select if the change should be recursive or not by clicking on the radio box. Click on "Change" in the end.
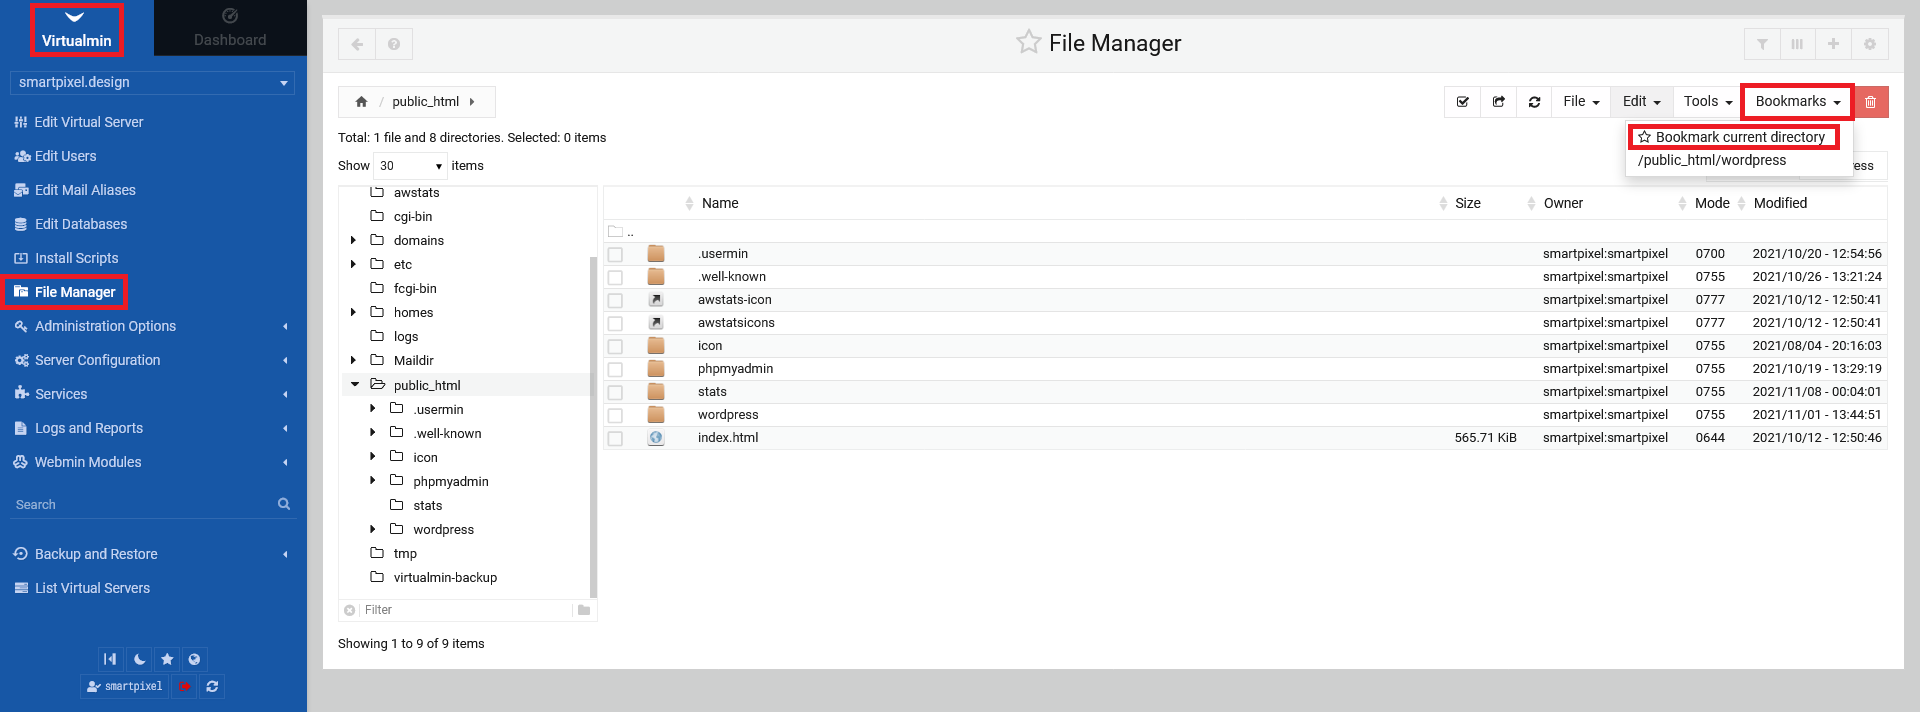
2.4 Bookmarking directories
To bookmark directories, click on "Bookmarks" in the top right menu and select "Bookmark current directory". Note, that you have to be in the directory you want to bookmark. Below, you see directories you already bookmarked (e.g. /public_html/wordpress).