1.1 Basics
To establish a secure connection to a web server, a SSL certificate (Secure Sockets Layer) is needed, generally. SSL certificates are small files that establish an encrypted link between a web server and a browser. That link makes sure, that all data between the server and the browser remain private. You can see, if the website/server uses SSL encryption by checking the URL. It should say https:// for SSL to be present. The process of adding a SSL certificate requires you to log into Virtualmin as a system administrator (not on the virtual server itself!).
1.2 Adding the SSL certificate (self-signed)
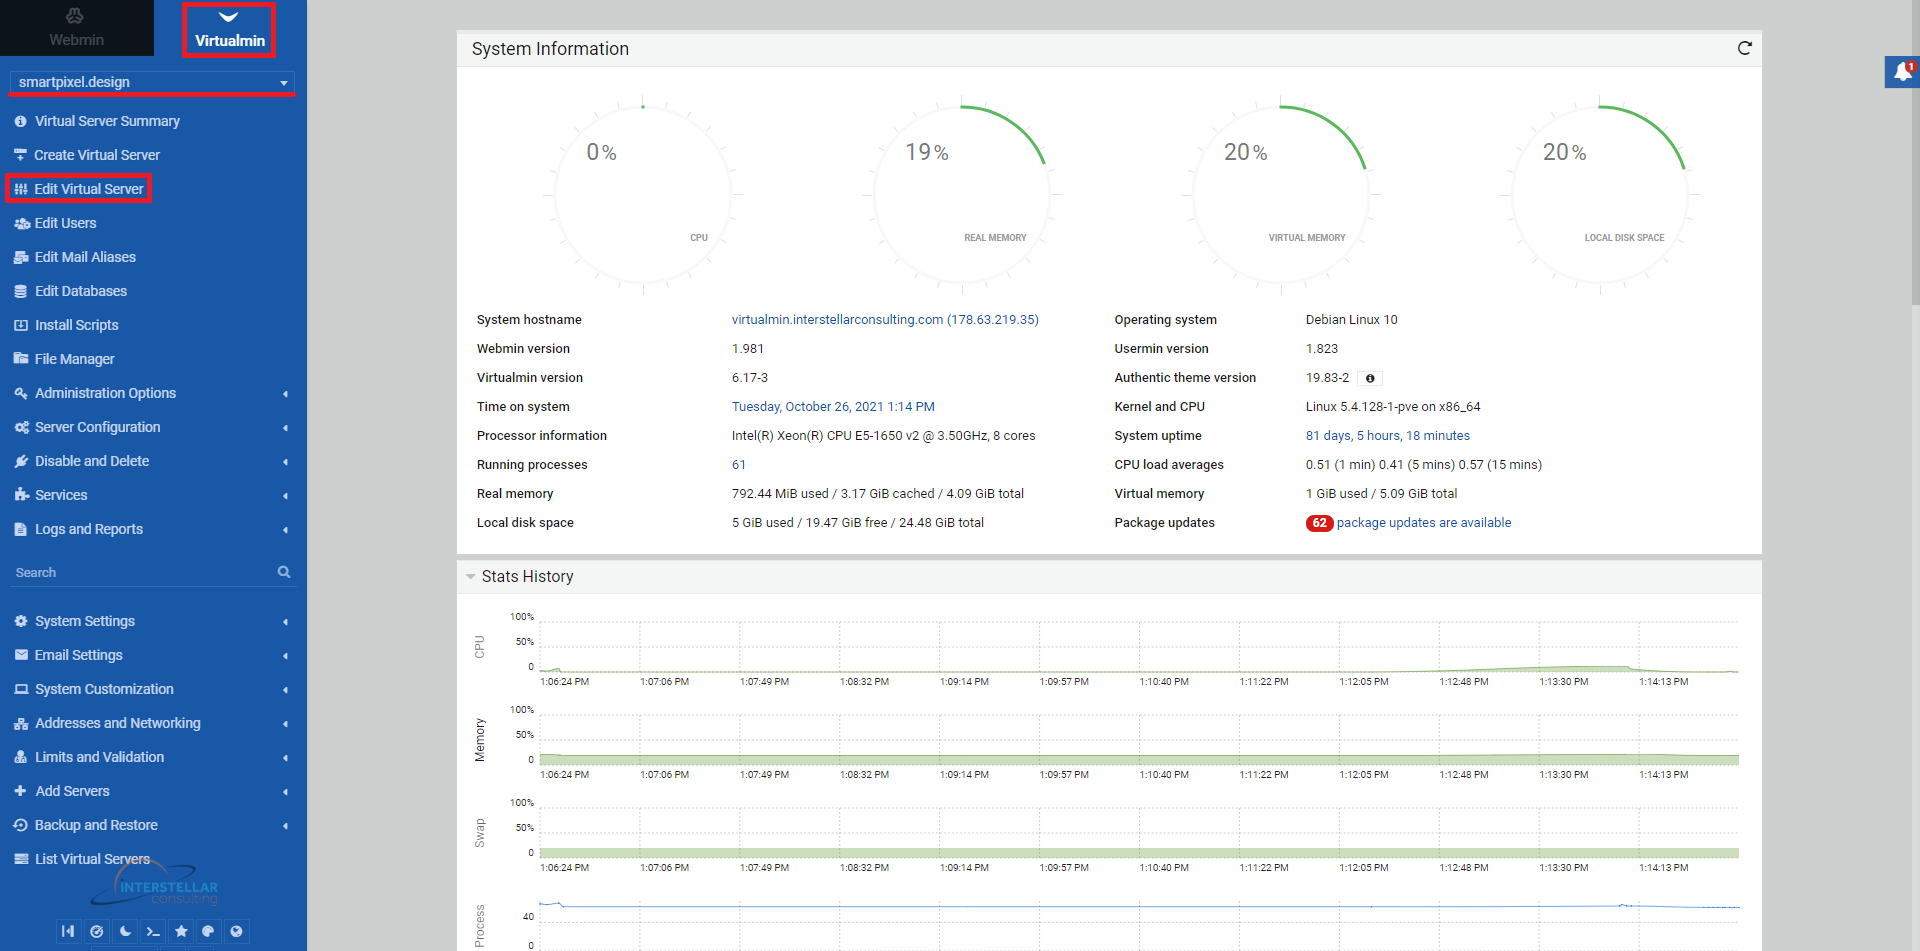
To add a SSL certificate choose the domain you want to add that certificate to from the drop down menu on the left side menu. Next, click on "Edit Virtual Server".
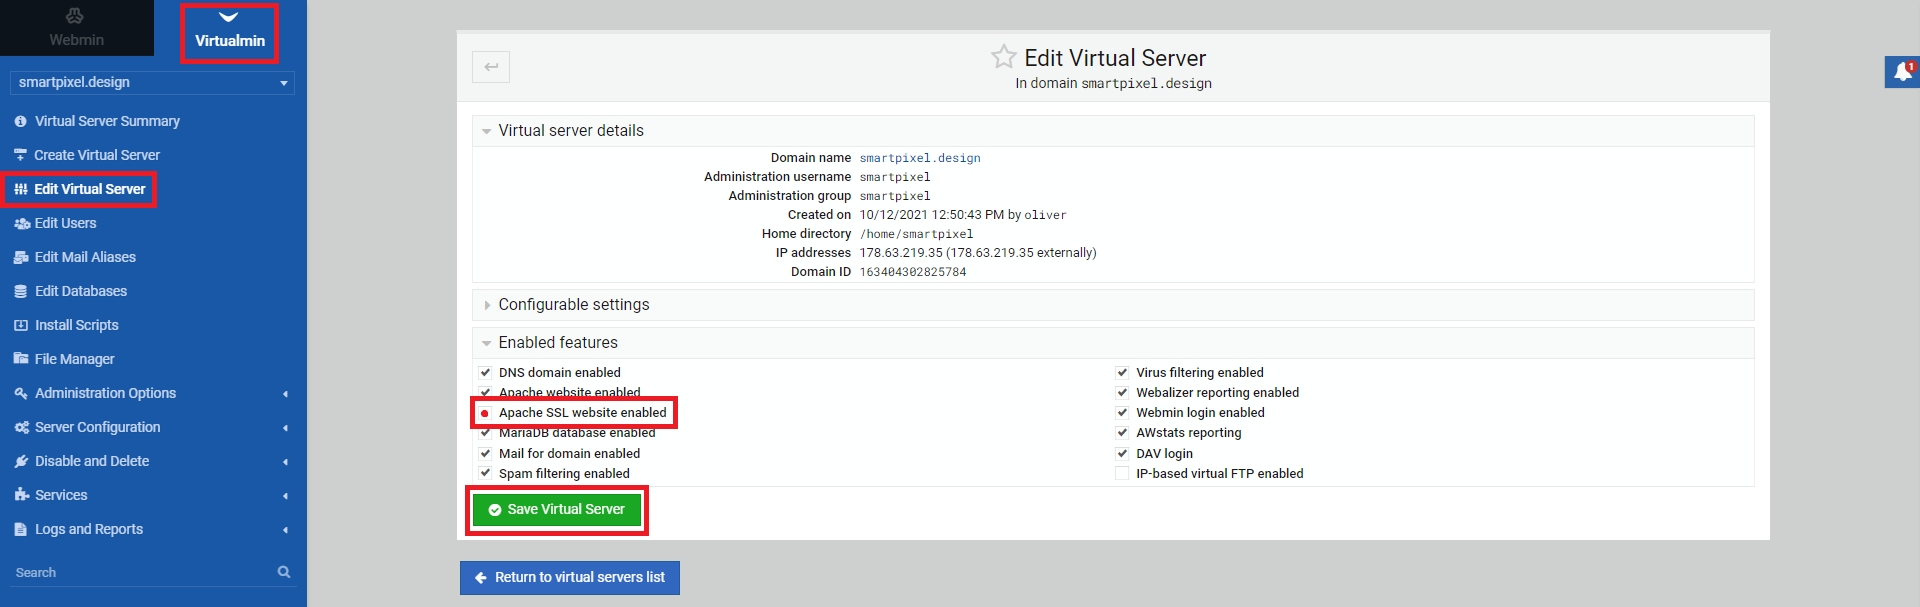
Open, in the next screen, the section "Enabled Features" and locate the option "Apache SSL website enabled". Click the radio box to select this option and click on "Save Virtual Server". With that step completed, the process of adding SSL to your server is done.
Note, that the connection between the server an the browser is now secure but due to the self-signing of the SSL certificate (the certificate is not signed by a certificate authority) visitors are going to get a security warning none the less.
1.3 Getting a commercial SSL certificate
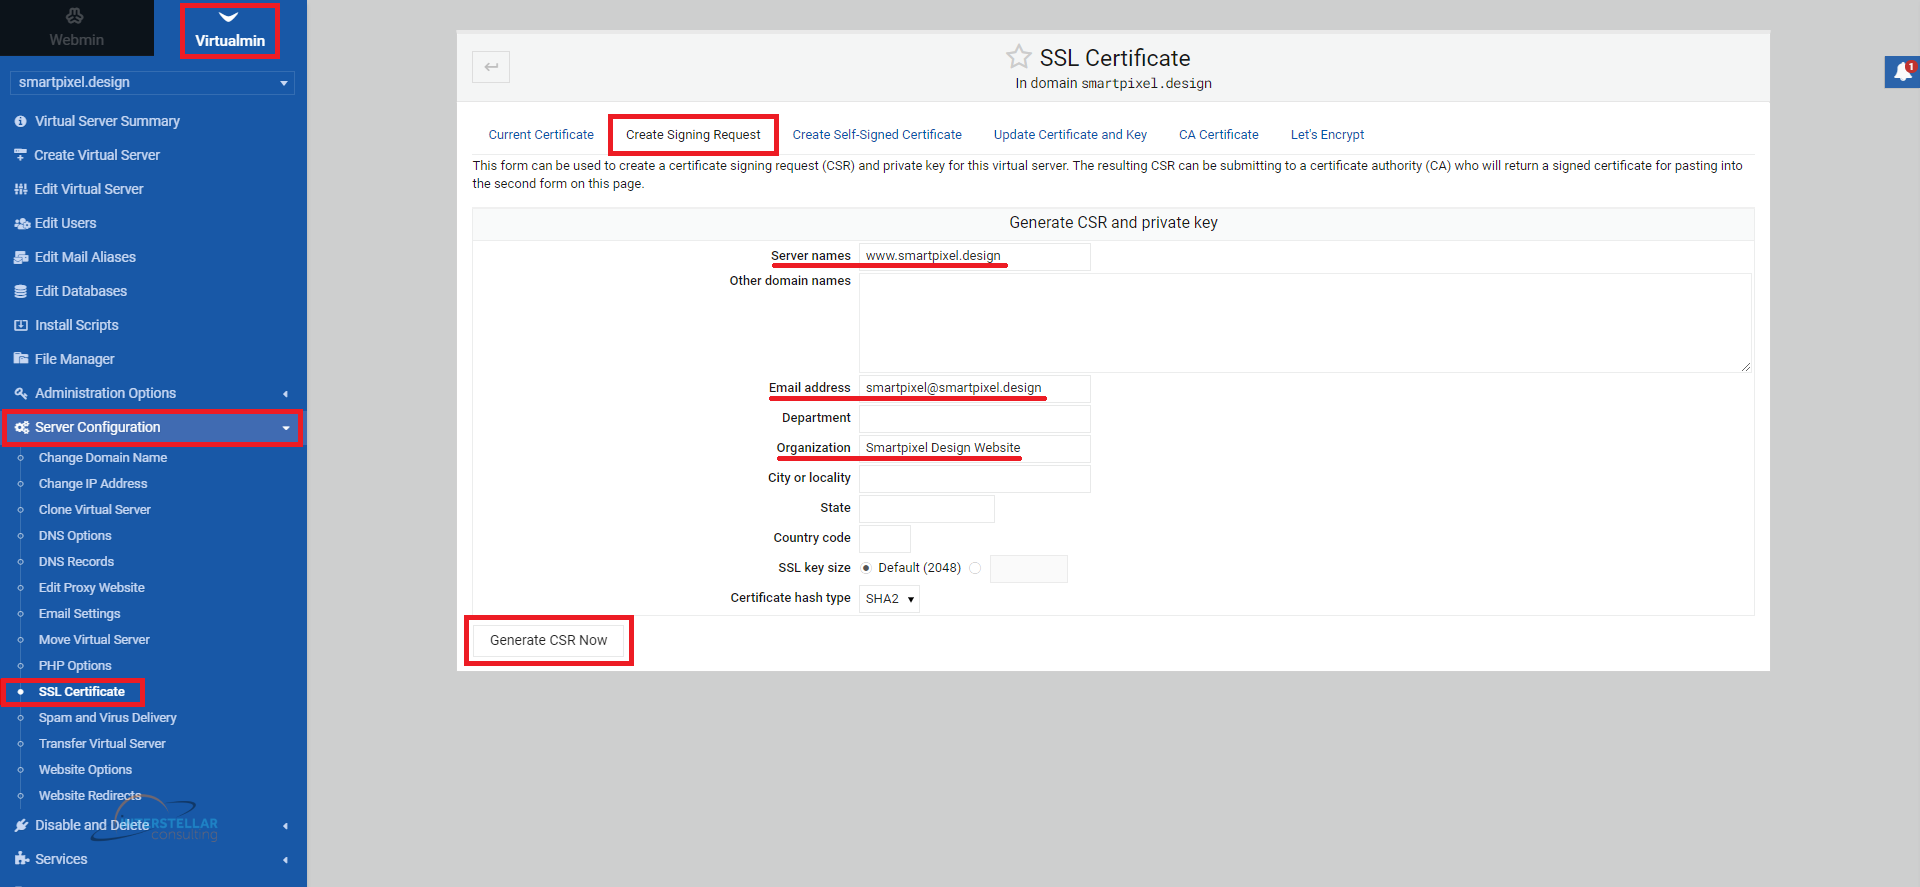
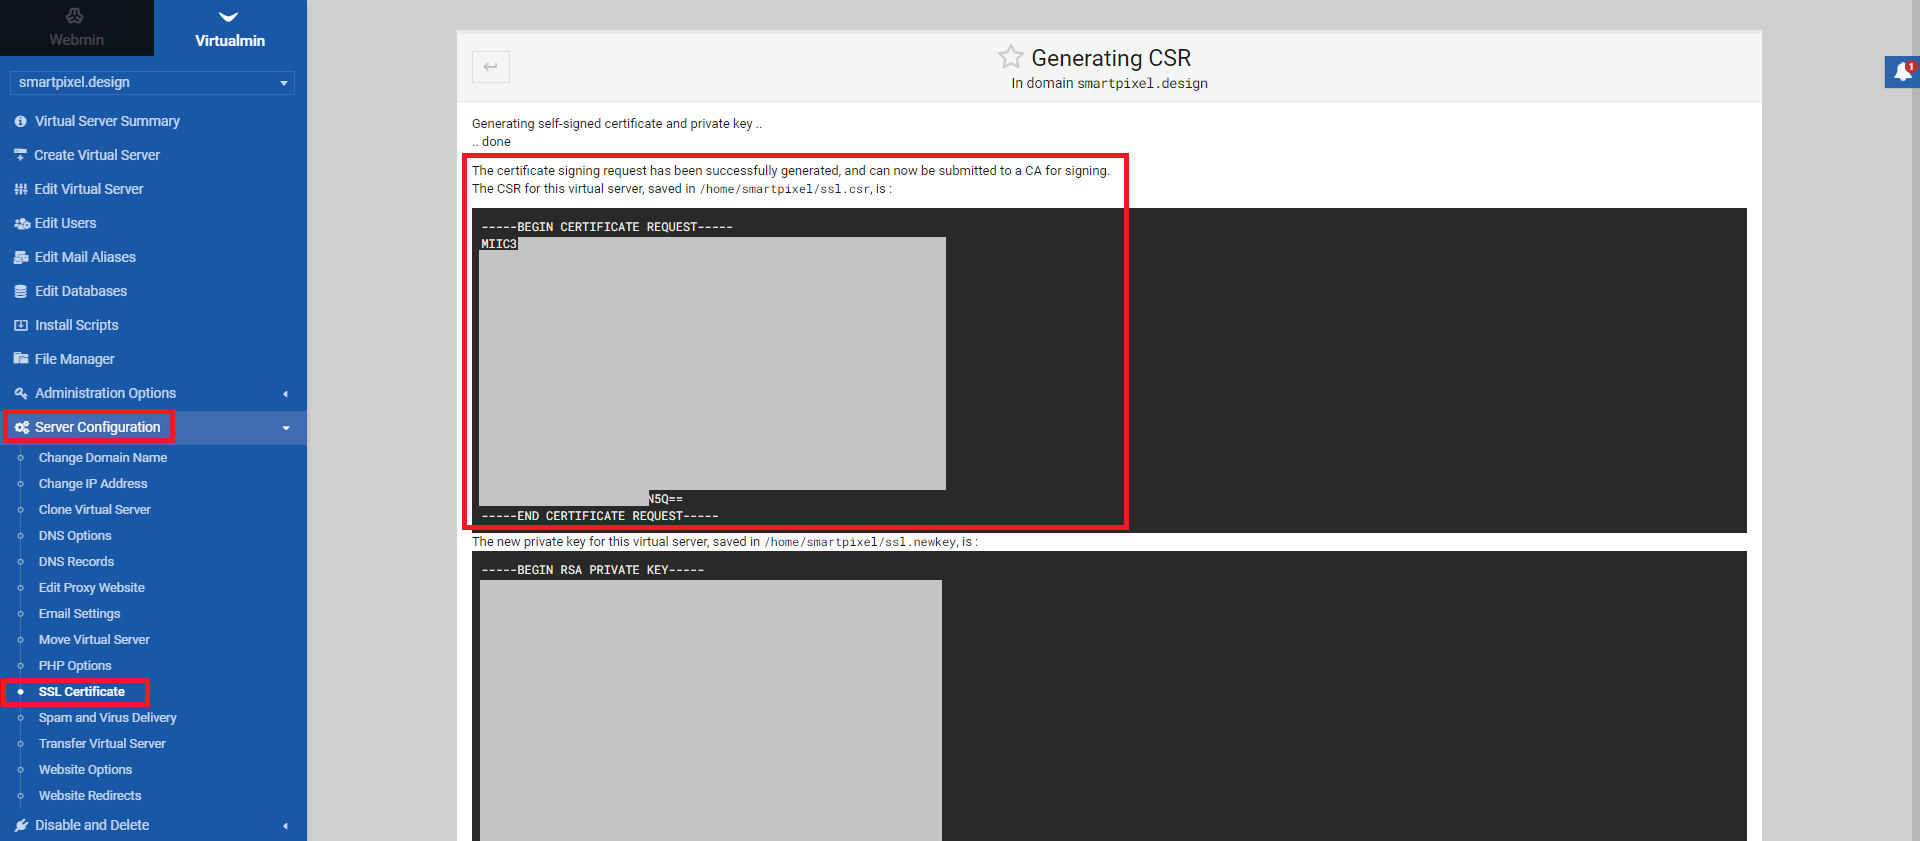
Go to the left side Virtualmin menu and click on "Server Configuration". Select "SSL Certificate" from the expanded sub-menu. Choose the menu tab "Create Signing Request" and fill out the details. Needed are "Server names", "Email address" and "Organization". These fields should be auto-filled already. Click on "Generate CSR Now".
In the next screen, you will see the certificate request and the generated private key.
The next step needs to be done outside Virtualmin, on your own. Take the "CSR" and let it be signed by a reputable company, doing SSL certificate signings. Have them use your created "CSR".
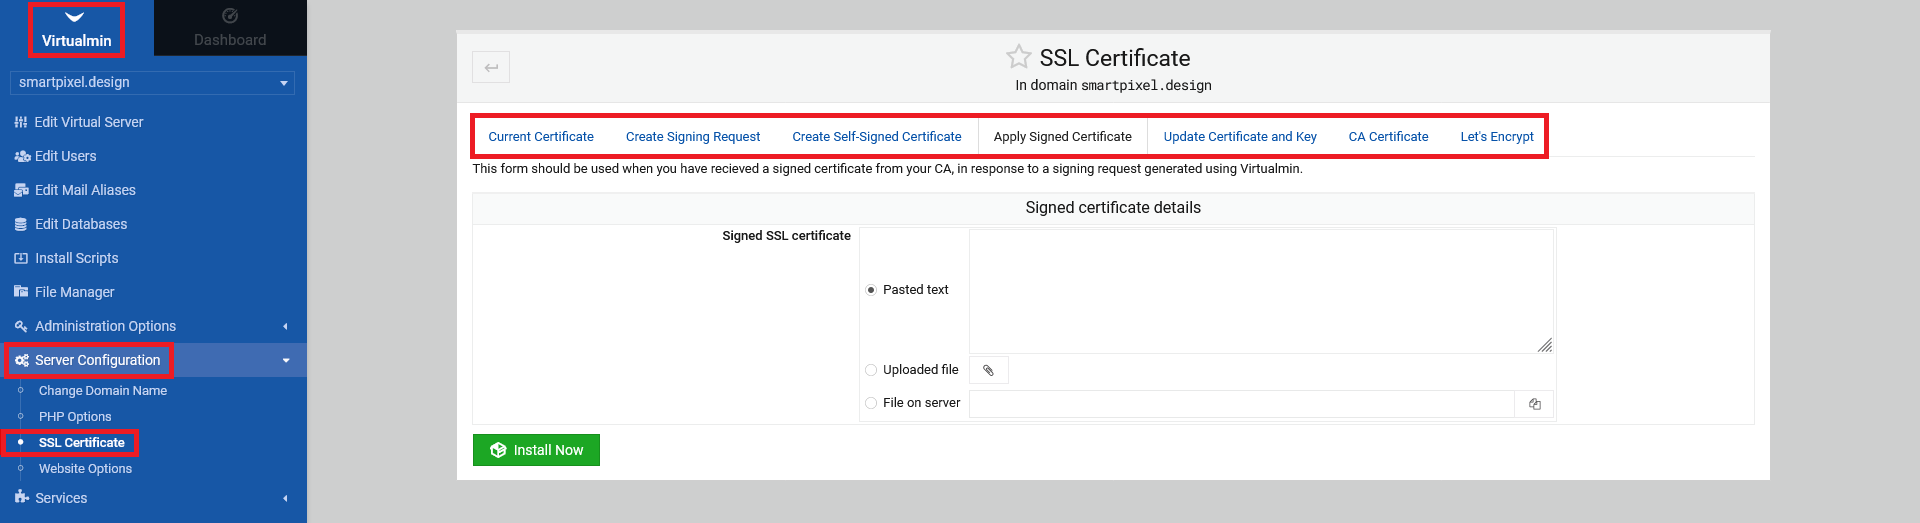
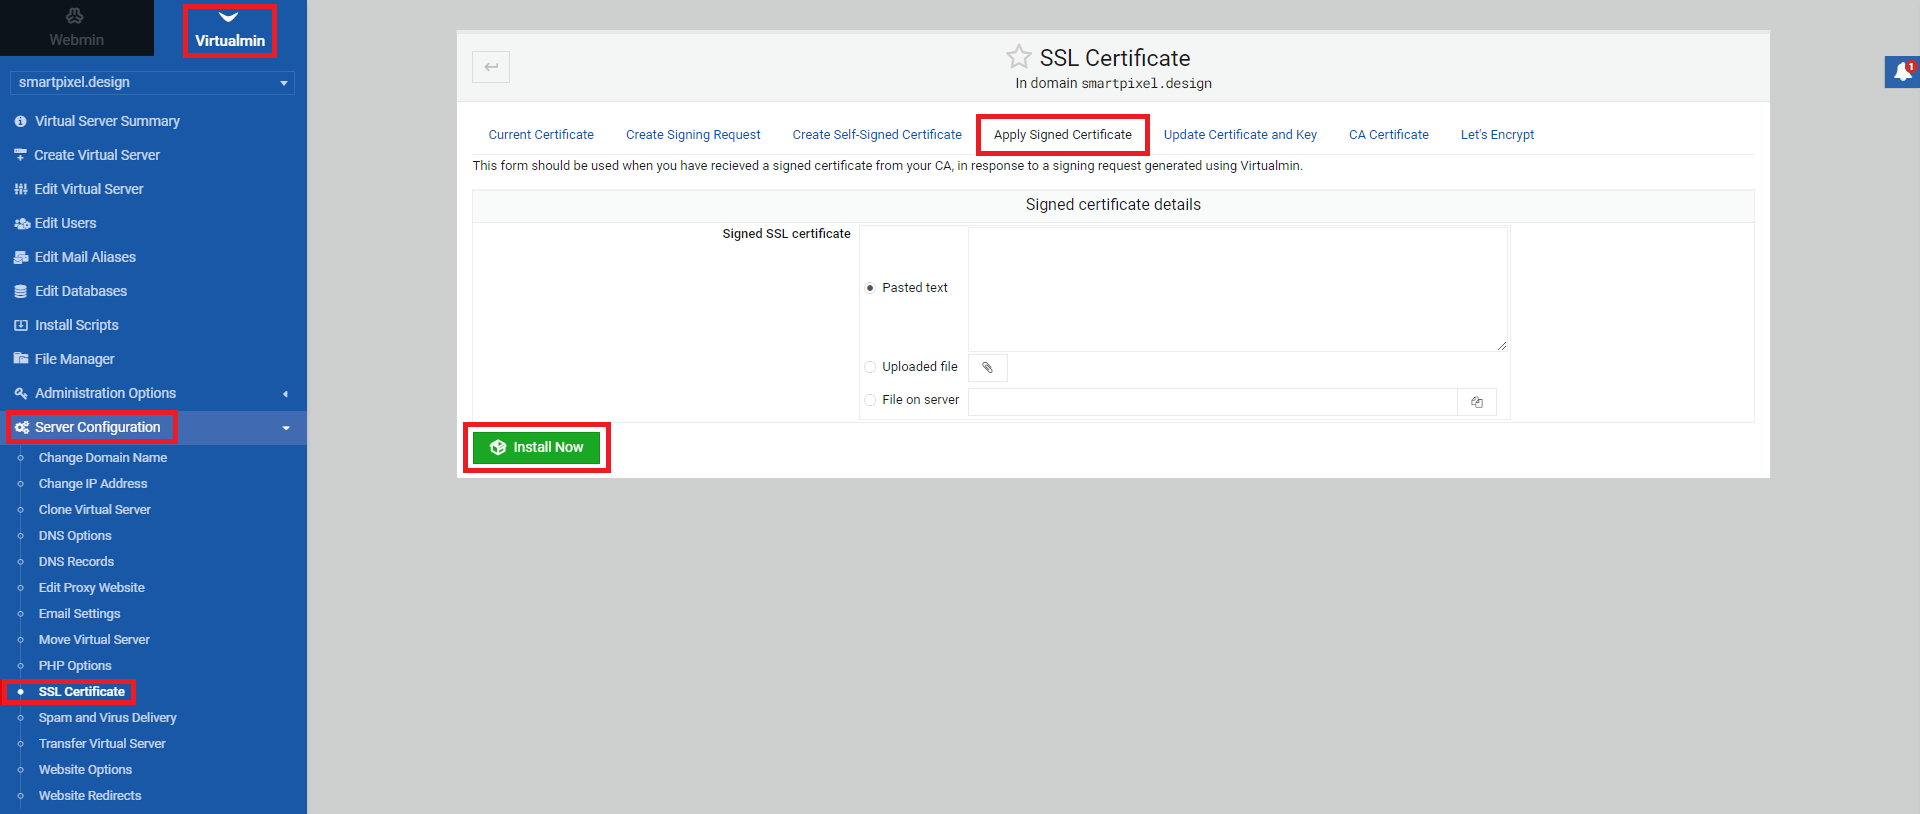
After you received your signed SSL certificate from the company of your choice, go to "Server Configuration -> SSL Certificate" and choose the menu tab "Apply Signed Certificate". Paste the respective text or upload the SSL certificate file. Click "Install Now" in the end. Now, any visitors shouldnt get the security warnings anymore.
1.4 SSL certificates as a server admin
The documentatio above covers the SSL topic from a system-level admins perspective but you can manage SSL certificates from on a server-admin level too. Log into your server account (in this example it is smartpixel.design server) and go from the "Dashboard" menu to the "Virtualmin" menu. Select "Server Configuration" and in the sub-menu "SSL Certificate". There you have all the same option as mentioned at 1.3