After creating the main/parent server, you can add a sub-server (sub-domains). This is particularly helpful, if you want to setup an additional service or site that is related to your main server/domain but offers/pursues a different functionality.
2.1 Creating a sub-server
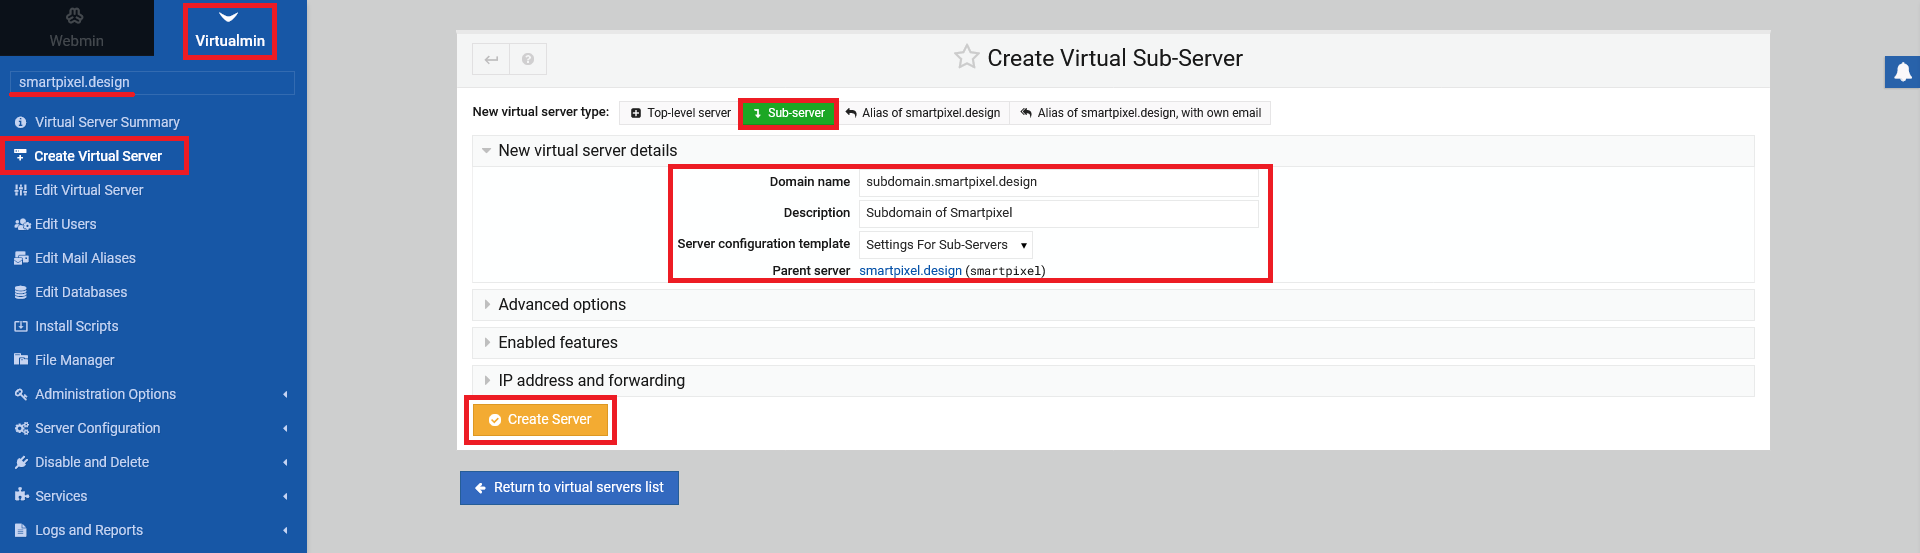
Click on "Create Virtual Server" in the left Virtualmin menu. You see the same form as in the step where the setup of a server/domain was documented. This time, click on the button that says "Sub-server". Fill out the "Domain name" and the "Description" of your sub-server. You dont need to touch anything regarding the "Server configuration template"; the default settings are fine. The "Parent server" is chosen accordingly to the server that has been selected in the left Virtualmin menu. You dont need to change anything on the tabs "Advanced options", "Enabled features" and "IP address and forwarding". Click on "Create Server" to finish the process.
2.2 Finalizing
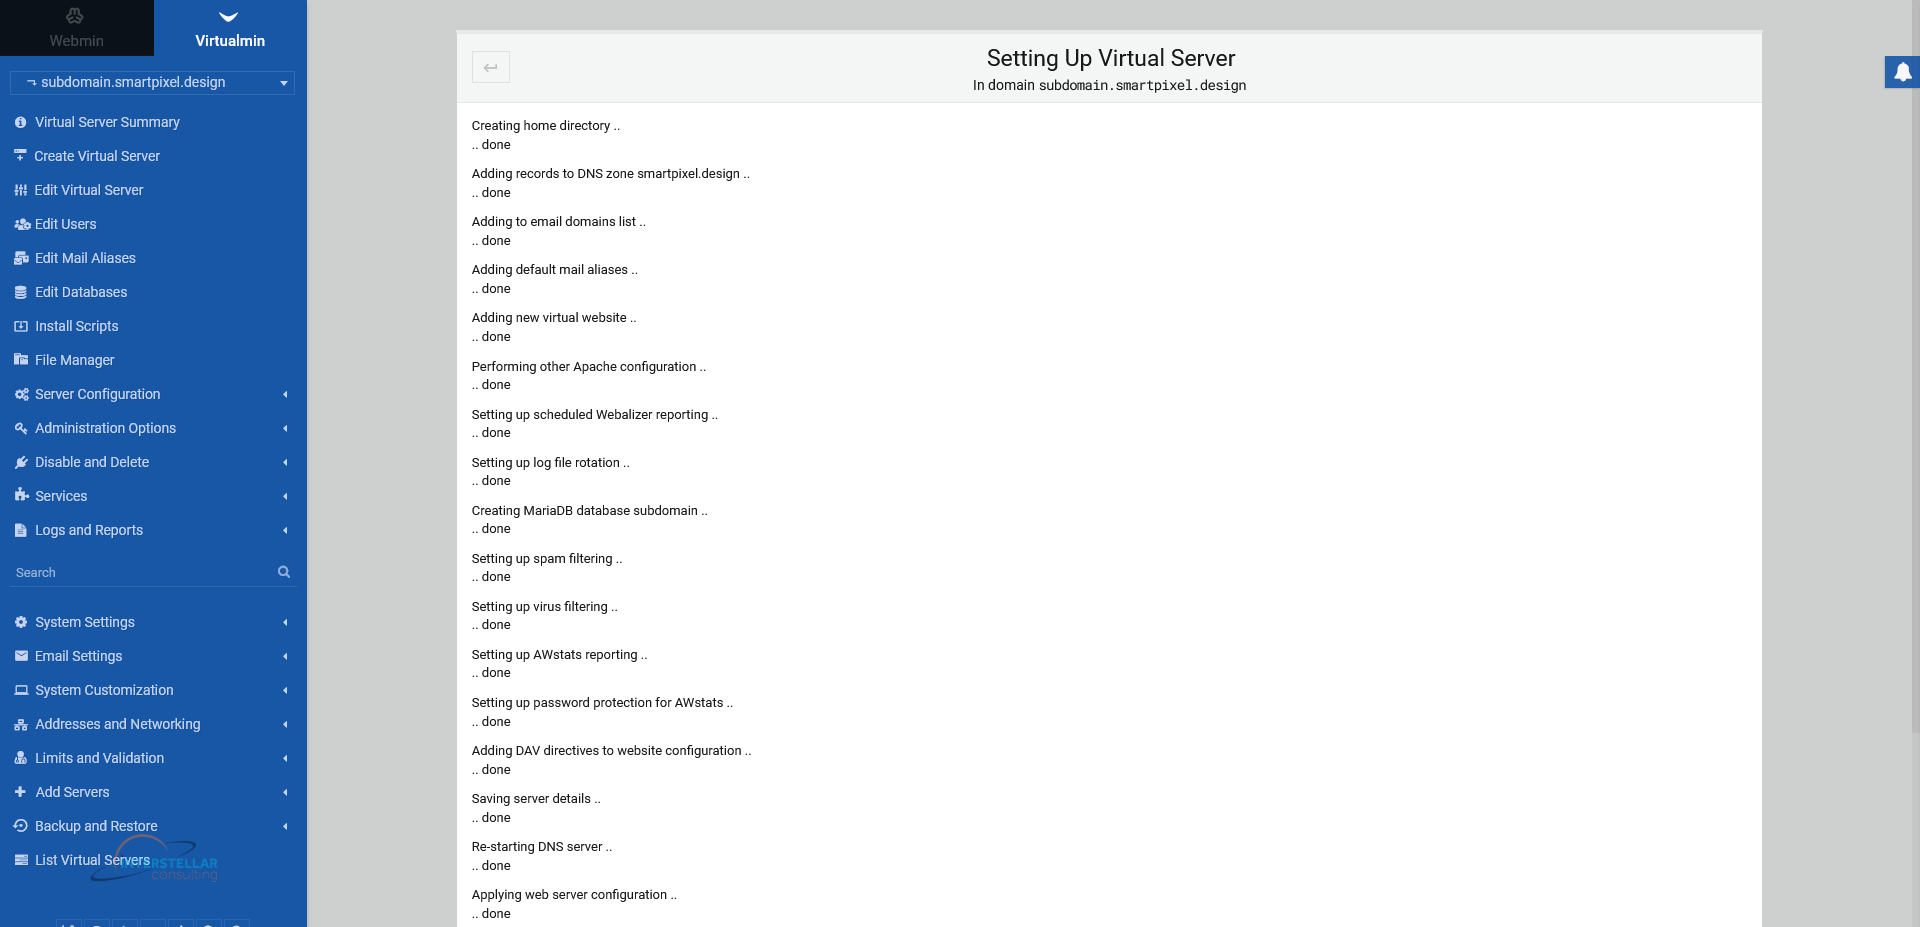
In the following screen, you see the automated process of Virtualmin creating the subs-server. Just let it run until it is finished. When all steps are done, you can proceed with whatever task you have to do.
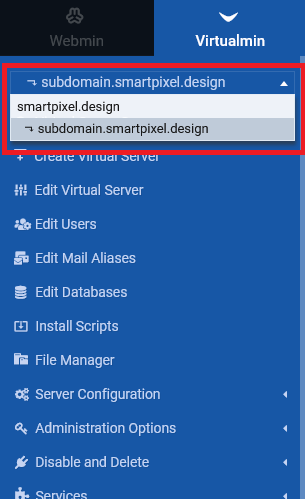
You can ensure yourself that everything was setup correctly by checking the server name overview on the left side Virtualmin menu. The drop down menu should show the parent server/domain and the sub-server/sub-domain.